20 Standing Yoga Poses to Include in Your Routine for Better Health
Standing yoga poses are a type of exercise you can perform anywhere that increases stability and body balance. Including them in your daily workout regime will provide a healthy mind and body, strengthening various body parts and maintaining proper blood circulation.
Keep scrolling through the article to learn more about these various yoga poses

Table of Contents

Top Standing Yoga Poses
These poses help calm your body and mind, thus filling you with positive energy. Engaging in a regular practice of standing yoga poses can not only enhance physical strength and flexibility but also promote mental clarity and emotional balance. Some additional examples of beneficial standing yoga poses include:
1. Tadasana (Mountain Pose)
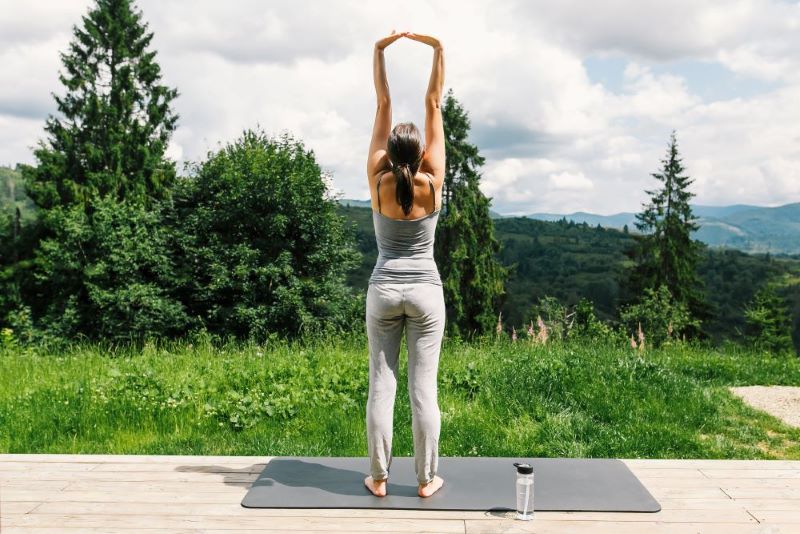
The Tadasana is one of the easiest poses, the base of many standing yoga poses. This pose requires keeping your ankles, knees, and hips straight. This, in turn, helps to improve your overall posture and maintain proper blood circulation throughout the body.
Yoga Level: Beginner
How to Do Tadasana (Mountain Pose)?
Step 1: Stand by keeping your feet parallel and maintain a few inches gap between them.
Step 2: Keep your head straight and stand firmly.
Step 3: Start lifting your arms upwards and keep the shoulder parallel to your ears.
Step 4: Hold this position briefly and keep your arms down.
What Are the Safety Precautions to Take While Performing Tadasana?
- Do not practise for a long time if you have leg pain.
- Refrain from putting excessive pressure on your knees.
Who Should Avoid Practising Tadasana?
- People with joint pain and low blood pressure.
- People with insomnia and migraine.
2. Warrior 1 (Virabhadrasana 1)
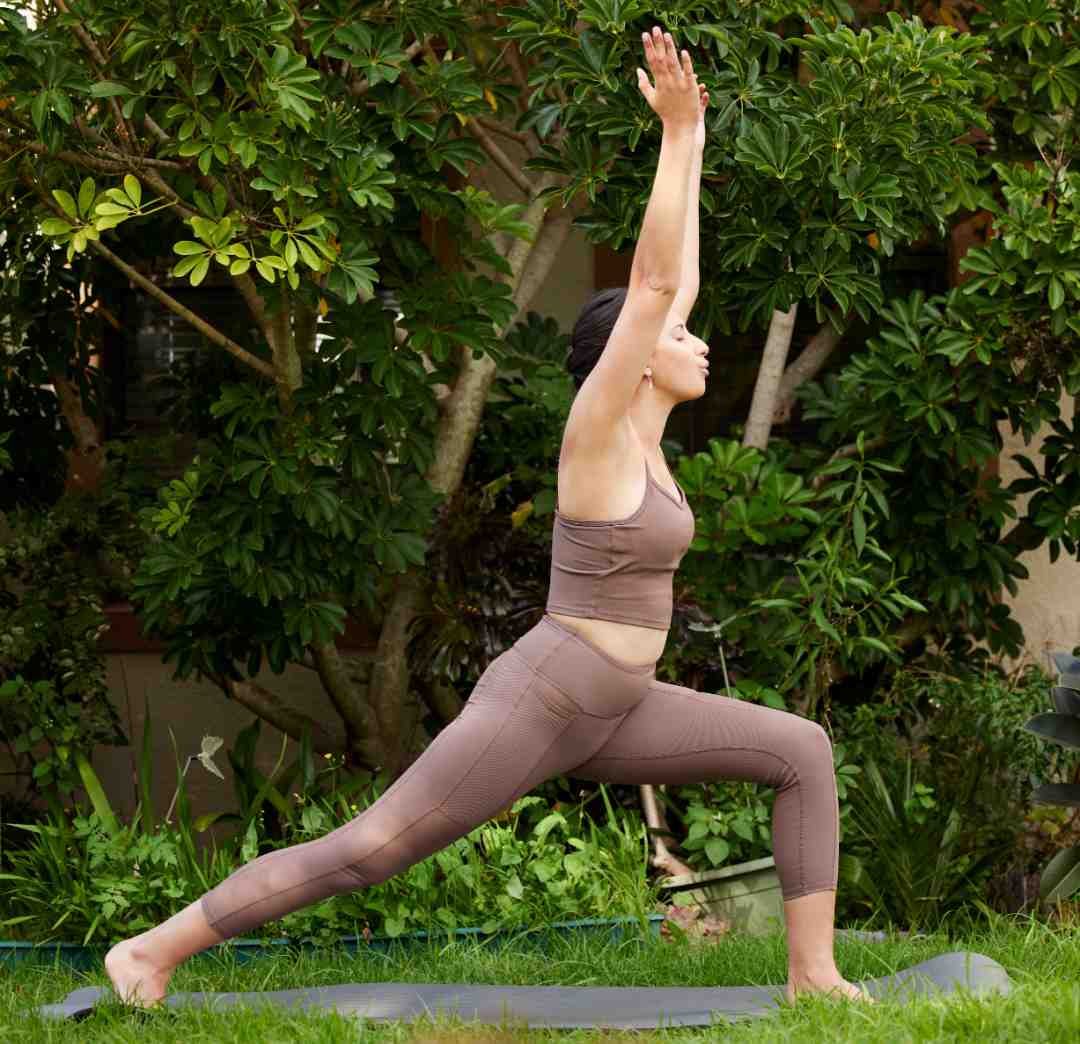
Virabhadrasana 1 or Warrior 1 is another beneficial standing yoga pose for beginners. The posture is mainly helpful for improving cognitive function and concentration power. However, as it involves full-body stretching, it leads to better body flexibility.
Yoga Level: Beginner
How to Do Warrior 1 (Virabhadrasana 1)?
Step 1: Start with a downward-dog position and keep your right knee near your nose.
Step 2: Touch and hold the ground with your arms, keeping your right leg between them.
Step 3: Keep your knees bent and lift your arms upwards.
Step 4: Hold this position for a few moments and release.
Step 5: Repeat the same with the other leg.
What Are the Safety Precautions to Take While Performing Warrior 1 (Virabhadrasana 1)?
- Avoid practising this asana for a long time.
- If you have neck pain, try to keep your neck neutral.
- Avoid if you have any spinal injury.
Who Should Avoid Practising Warrior 1 (Virabhadrasana 1)?
- People with heart issues, high blood pressure, and chronic illness.
- People who have serious neck, shoulder, or knee pain
3. Warrior 2 (Virabhadrasana 2)
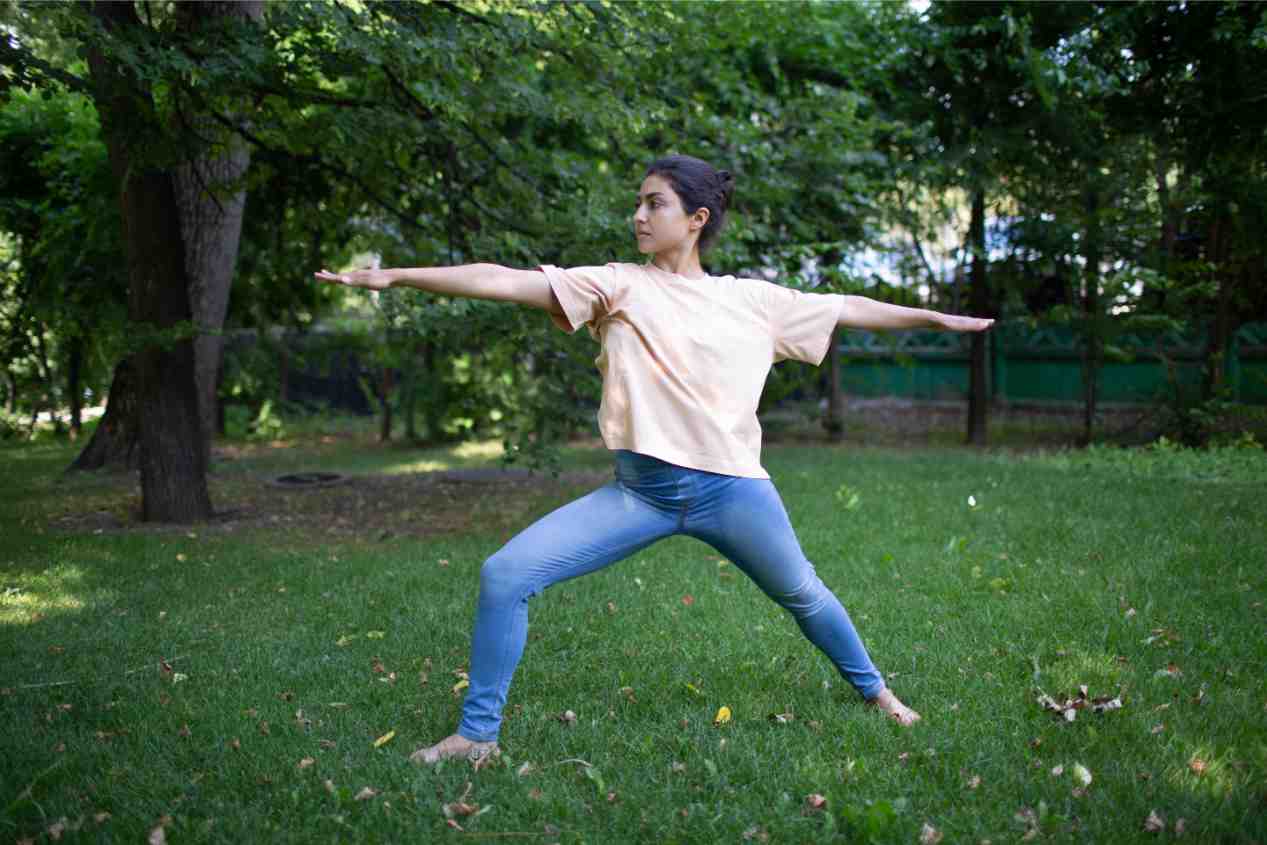
This is a part of the Virabhadrasana series, where you need to extend your hands right from your shoulder. You must keep your gaze fixed throughout the posture, calm your mind, and concentrate, providing mental freshness. In addition, it involves full-body stretching, which helps gain a better physique and body balance.
Yoga Level: Intermediate
How to Do Warrior 2 (Virabhadrasana 2)?
Step 1: Stand straight and stretch your arms apart, parallel.
Step 2: Keep your ankles beneath your knees.
Step 3: Stretch your right leg forward, bend your knee and keep your body balanced on your ankle.
Step 4: Remain in this position for a few breaths, release, and repeat with the other leg.
What Are the Safety Precautions to Take While Performing Warrior 2 (Virabhadrasana 2)?
- Ensure even distribution of body weight on both legs.
- Avoid it if you have neck and knee pain.
- Avoid practising if you have any spinal ailment.
- Avoid practising diarrhoea.
Who Should Avoid Practising Warrior 2 (Virabhadrasana 2)?
- People who have neck, shoulder, or hip surgery.
- People with high blood pressure.
4. Warrior 3 (Virabhadrasana 3)
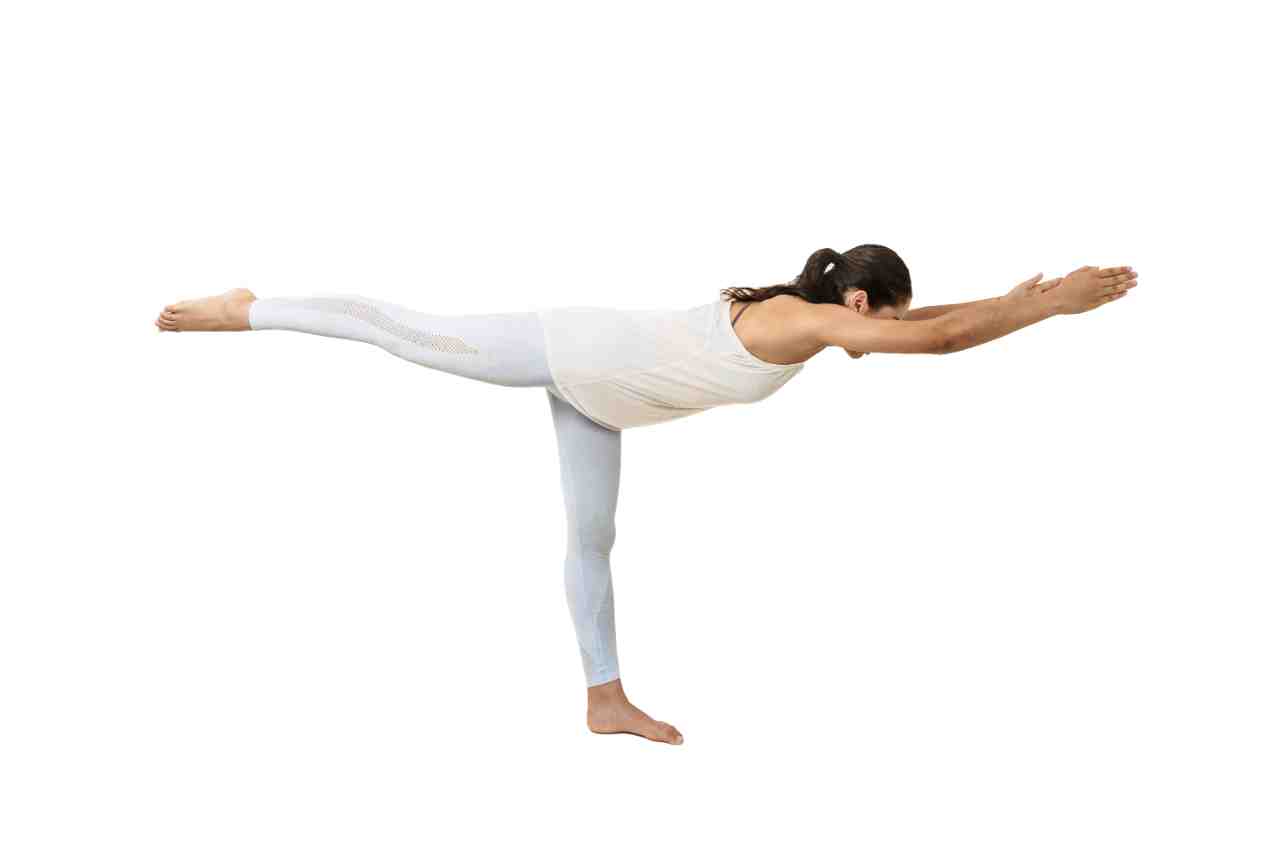
Warrior 3 is the advanced pose of the Warrior series, where you need to stand on one leg while the other is firmly grounded. The pose is beneficial for strengthening leg and back muscles, thereby balancing and improving your posture.
Yoga Level: Intermediate
How to Do Warrior 3 (Virabhadrasana 3)?
Step 1: Start with the Virabhadrasana 1 pose.
Step 2: Ground your right leg firmly, lift your lower abdomen and keep your tailbone down.
Step 3: Strengthen your arms, lift your left leg, and swing your arms towards your back.
Step 4: Hold a few breaths and release.
What Are the Safety Precautions to Take While Performing Warrior 2 (Virabhadrasana 2)?
- Do not force your body to perform the posture.
- Stop practising if you feel pain.
- Avoid practising if you have balance issues.
Who Should Avoid Practising Warrior 2 (Virabhadrasana 2)?
- People with ankle and knee injuries.
- People who have back and shoulder injuries.
- Patients with high blood pressure.
5. Uttanasana (Forward Fold)
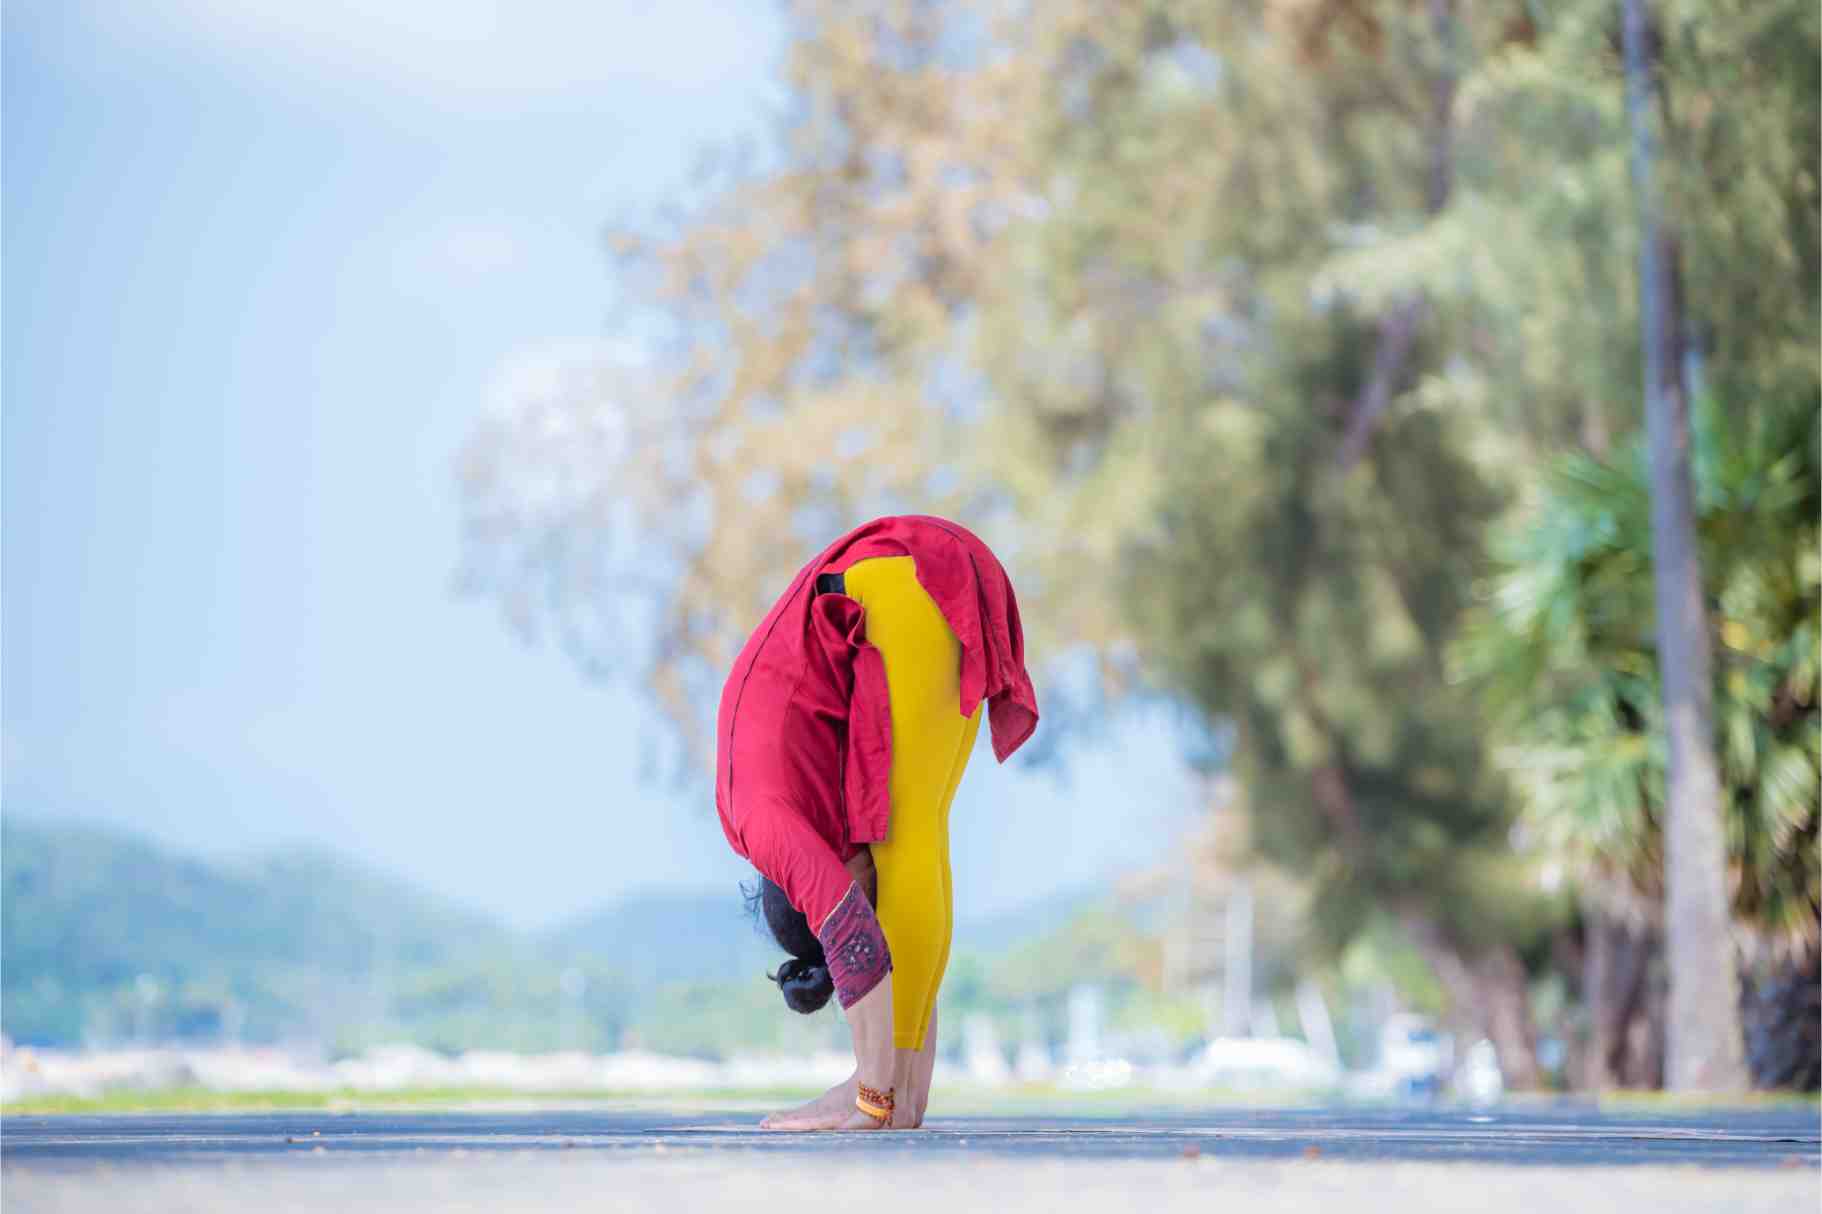
Uttanasana is a traditional yoga pose that involves full-body stretching. In this pose, the knees should be straight, and you must bend your body downwards to touch the ground. As the posture involves extreme body bending, it helps strengthen core and leg muscles and helps in reverse blood flow.
Yoga Level: Beginner
How to Do Uttanasana (Forward Fold)?
Step 1: Stand straight on a yoga mat, keeping your hands by your side.
Step 2: Lift your hands upwards and bend your body to your feet with a deep exhale.
Step 3: Touch the ground with the palm and your forehead with the knees.
Step 4: Hold this position for a few breaths and stand up again.
What Are the Safety Precautions to Take While Performing Uttanasana?
- Avoid taking a meal before practising Uttanasana.
- Stop practising if you feel pain.
- Refrain from performing this posture if you have glaucoma.
Who Should Avoid Practising Uttanasana?
- People with back and neck injuries.
- People who have pain in the ankle or knee joint.
- Pregnant and menstruating women.
6. Triangle Pose (Utthita Trikonasana)
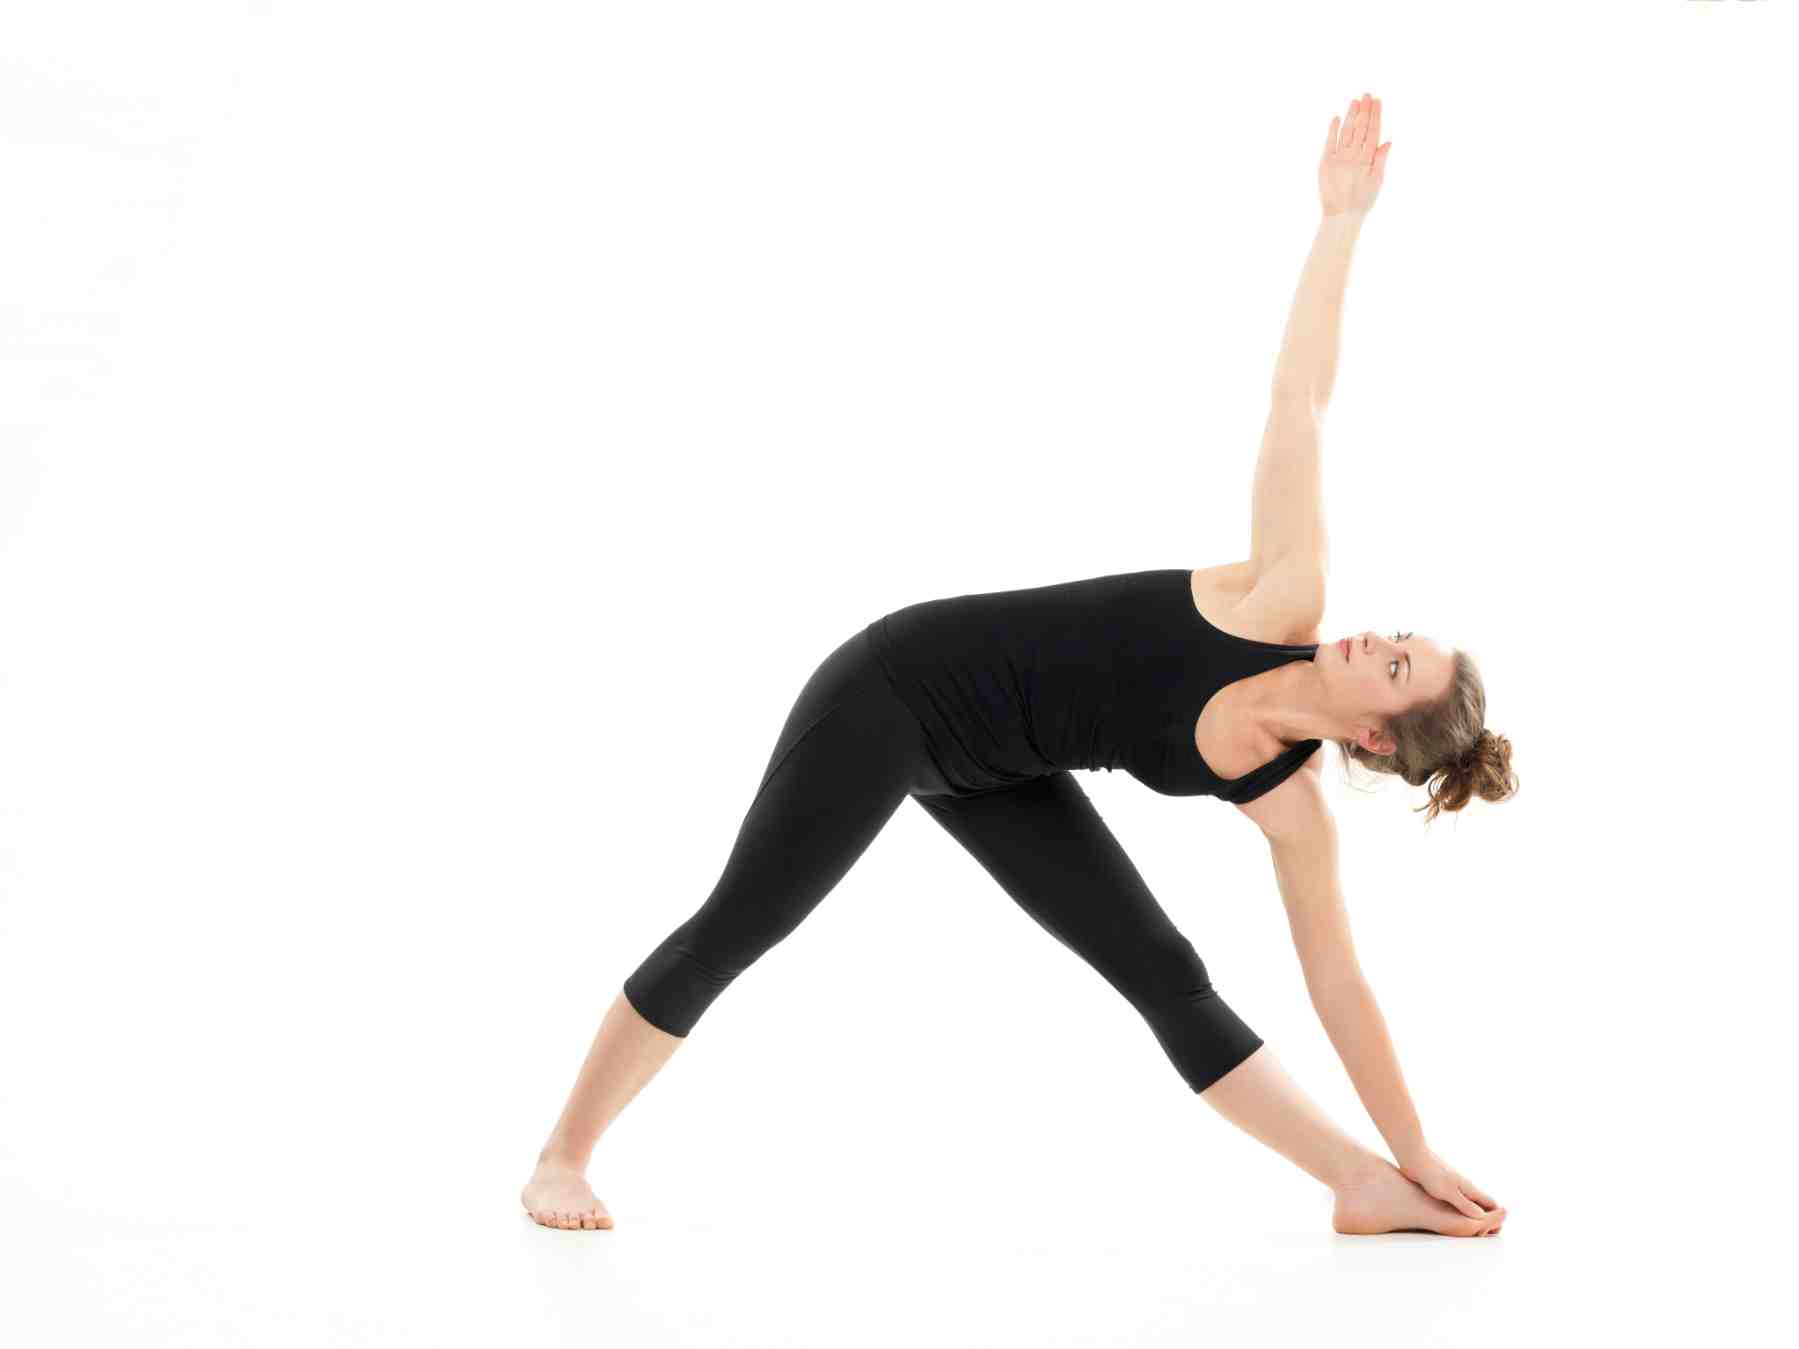
Utthita Trikonasana, or triangle pose, is a beneficial standing yoga pose where you need to form a triangle shape with your body. This beginner’s friendly pose involves exercising body parts such as the hamstrings, chest, groyne, and hips. The posture strengthens these muscles and is a good warm-up for more advanced yoga poses.
Yoga Level: Beginner
How to Do Triangle Pose (Utthita Trikonasana)?
Step 1: Stand and spread the legs wide apart.
Step 2: Spread your arms in a T structure.
Step 3: Bend your right on the right side.
Step 4: Raise your left arm and hold the position briefly.
Step 5: Release and repeat with the opposite side.
What Are the Safety Precautions to Take While Performing Triangle Pose?
- Avoid it if you have a migraine.
- Avoid practising if you have diarrhoea.
Who Should Avoid Practising Triangle Pose (Utthita Trikonasana)?
- People with severe back pain or neck injury.
- People with vertigo and dizziness.
7. Tree Pose (Vrksasana)
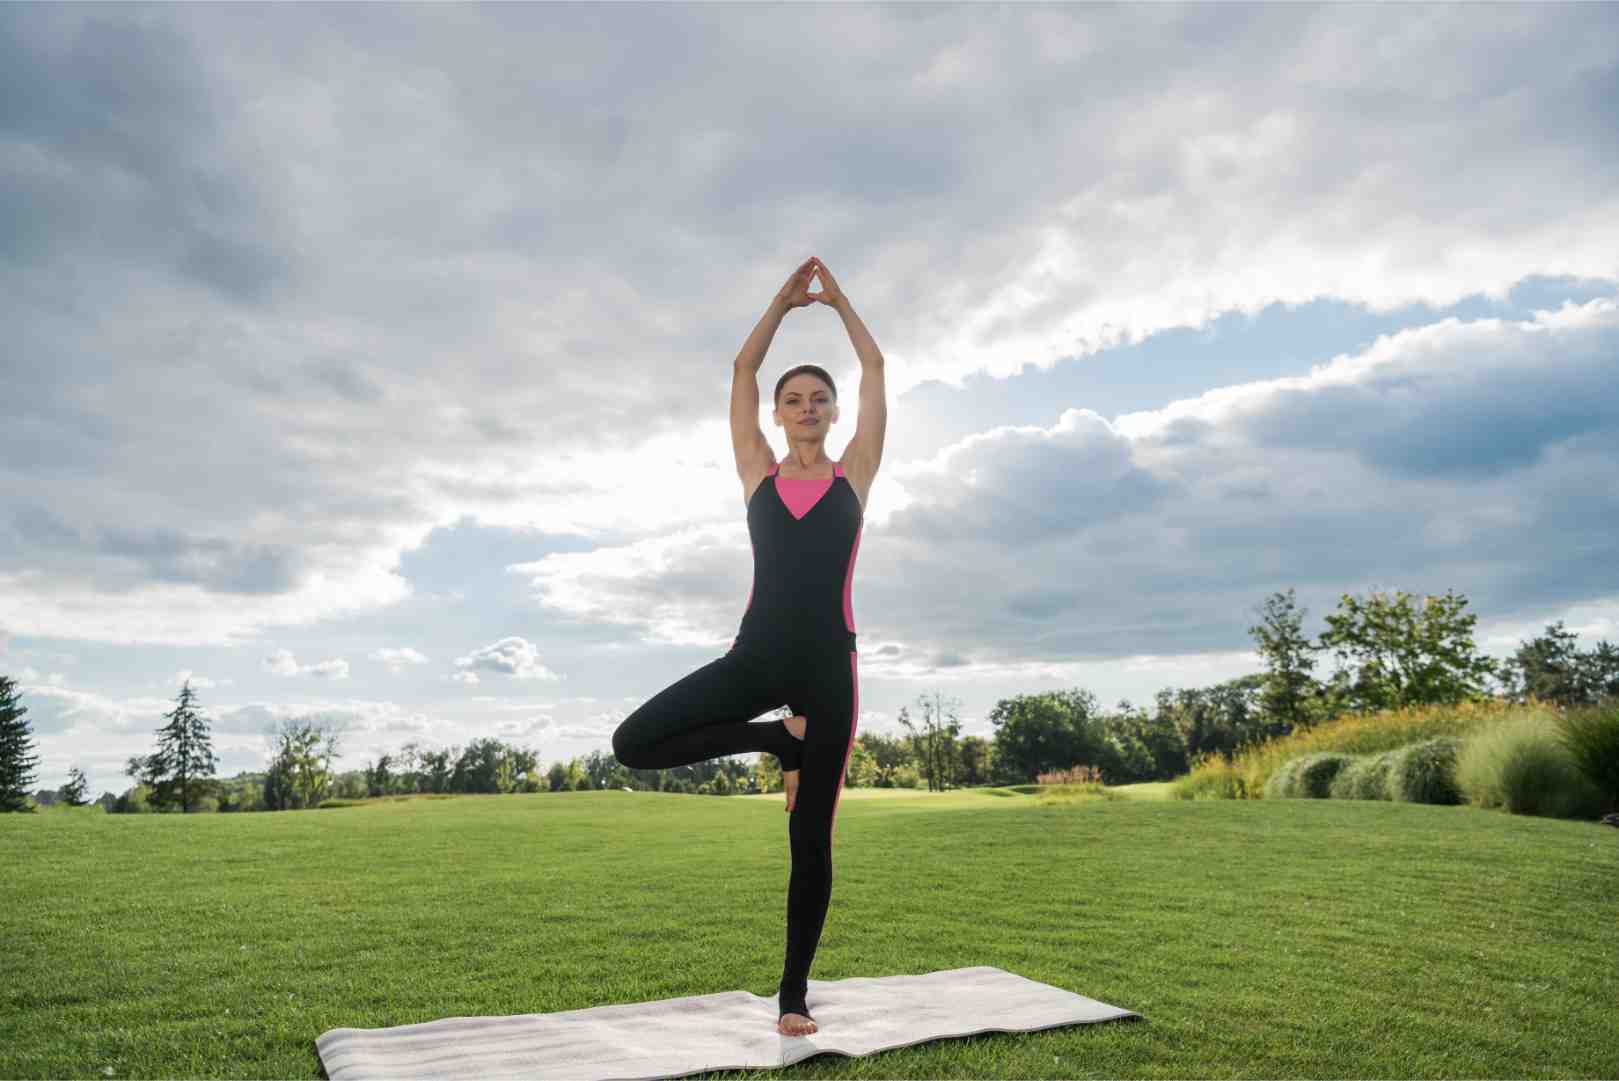
Tree pose, as its name suggests, helps to gain the firmness of a tree by giving you a better body balance. The posture is extremely beneficial for strengthening your core, glutes, legs, and back muscles.
Yoga Level: Intermediate
How to Do Tree Pose (Vrksasana)?
Step 1: Stand straight on a flat surface.
Step 2: Keep one of your feet firmly on the ground and lift the other.
Step 3: Bend the knee and bring the lifted foot to the thigh or leg muscles of the other leg.
Step 4: Keep your hands folded near your chest or raise upward and hold the position for a few breaths.
What Are the Safety Precautions to Take While Performing Tree Pose?
- Do not practise it after taking a meal.
- Do not practise if you have balance difficulty.
- Avoid practising if you feel pain or discomfort.
Who Should Avoid Practising Tree Pose?
- People with low blood pressure.
- Insomniac people.
- People who have severe leg pain.
8. Malasana (Yogi Squat)
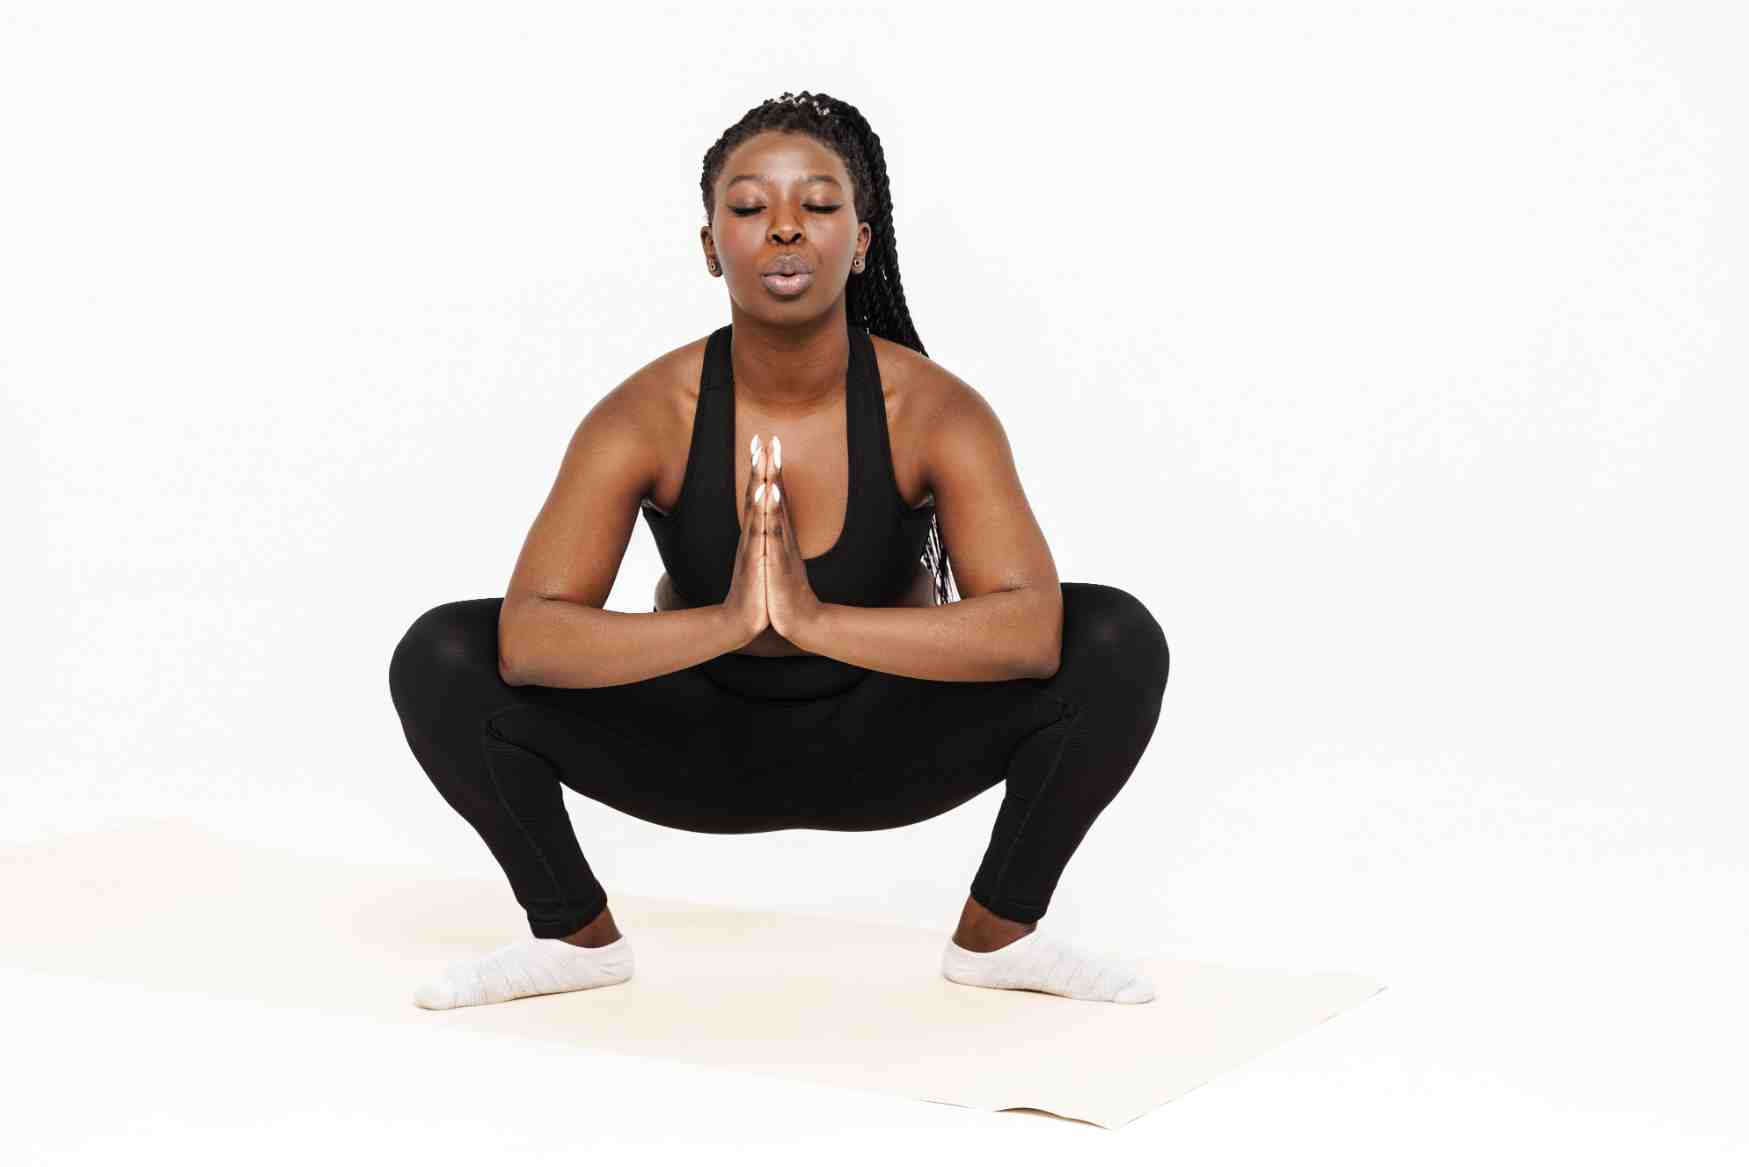
Yogi squat or Malasana is a great exercise for the hip, lower abdomen, and leg muscles. The pose is also called the ‘pose of youth’ as it denotes the youth of our body. Further, you can benefit by opening and stretching your hips, mighty legs, and stronger back muscles.
Yoga Level: Beginner
How to Do Malasana (Yogi Squat)?
Step 1: Stand straight on a flat surface and keep your feet wide apart.
Step 2: Fold your hands similar to the prayer posture and bring them near your chest.
Step 3: Sit down in a squatting position, hold the position for a few breaths, and stand erect again.
What Are the Safety Precautions to Take While Performing Malasana?
- Do not perform if you have knee pain.
- Perform it on an empty stomach.
- Do not hurry while squatting.
- Do not perform just after running.
- Refrain from excessive practising of this posture.
Who Should Avoid Practising Malasana?
- People with neck or back injuries.
- Sciatica or patients with hip surgery.
9. Peaceful Warrior (Shanti Virabhadrasana)
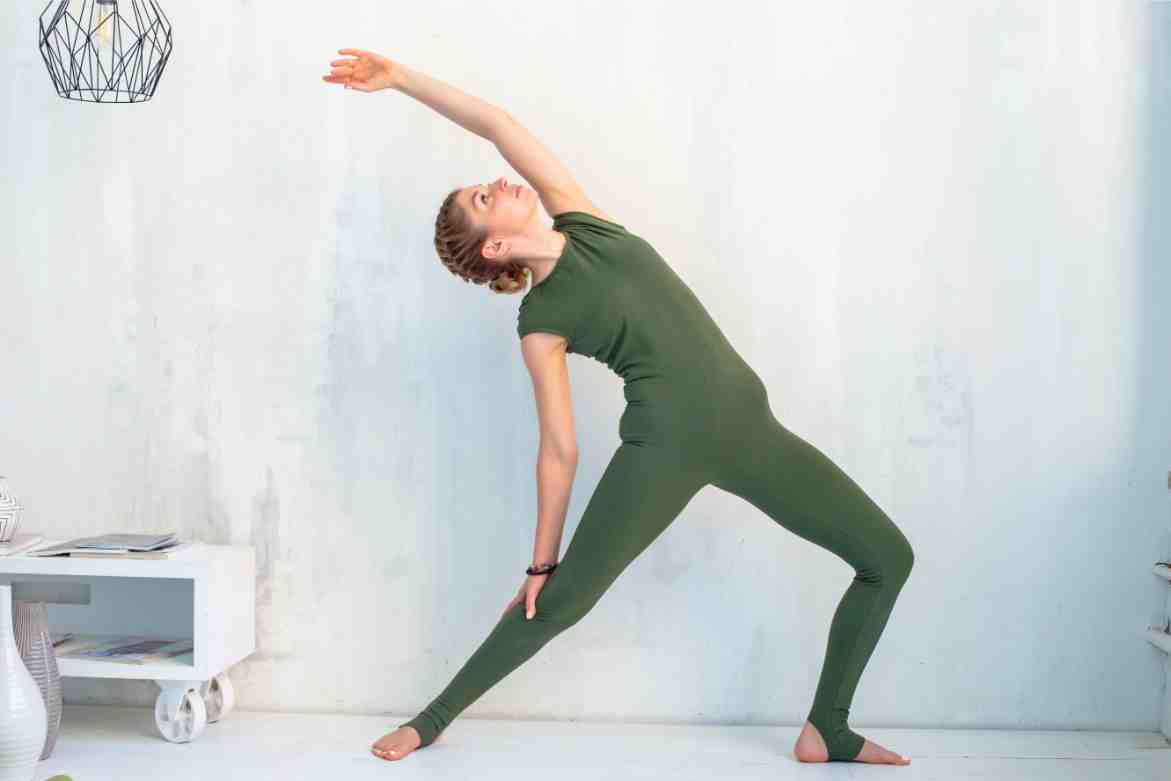
The peaceful Warrior pose is a transitional posture between a downward-facing dog and warrior 2 traditionally. The posture involves backward body stretching and full body movement, which is very helpful in retaining body flexibility. Further, it helps to calm your nerves, stretches your shoulders and arms, and gives better body balance.
Yoga Level: Beginner
How to Do Peaceful Warrior (Shanti Virabhadrasana)?
Step 1: Start with a warrior pose.
Step 2: Bring your left foot forward and lift your left hand towards the ceiling.
Step 3: Inhale and bend your body backwards gently.
Step 4: Hold the position for a few moments and release.
Step 5: Repeat with the other leg
What Are the Safety Precautions to Take While Performing Peaceful Warrior?
- Avoid it if you have a serious knee or back injury.
- Stretch your arms carefully to avoid any injury.
Who Should Avoid Practising Peaceful Warrior?
- People with slipped discs, herniated discs, or any kind of spinal injury.
- People with heart diseases.
- Cervical Spondylosis and vertigo patients.
10. Triangle Twist (Parivrtta Trikonasana)
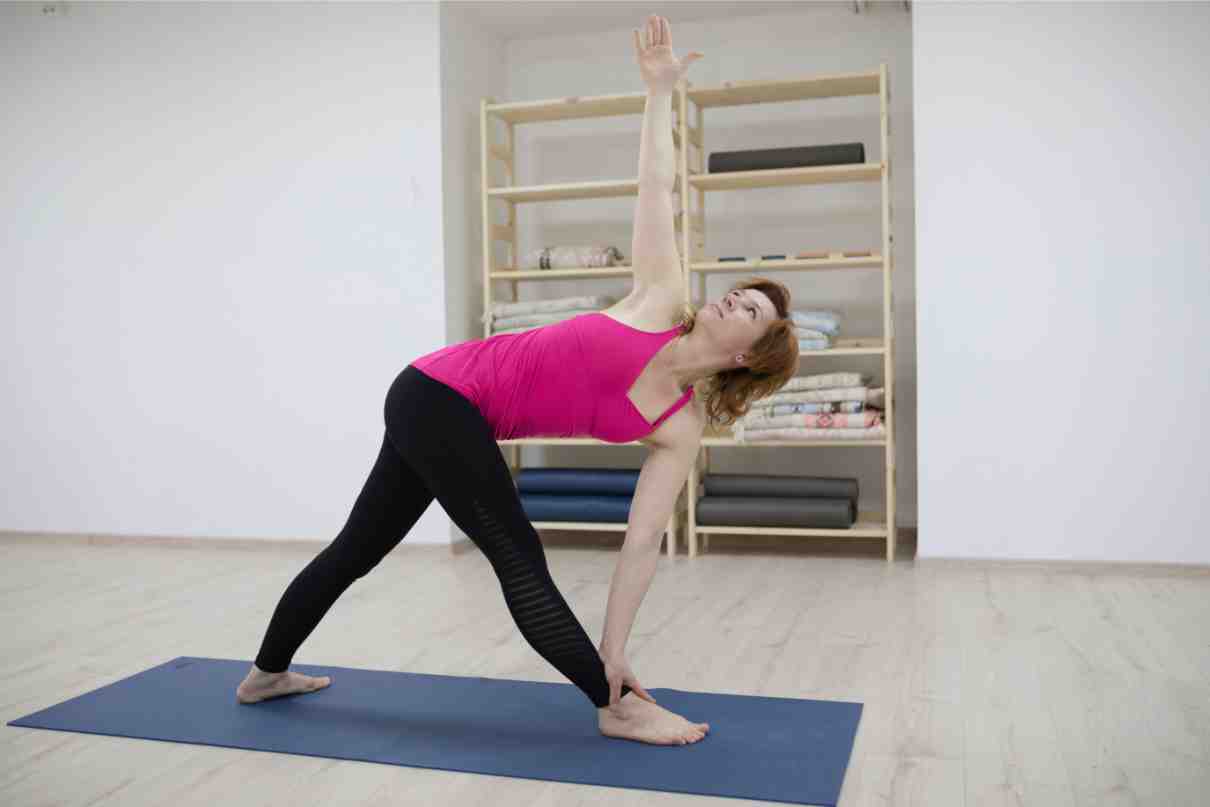
Triangle Twist is a variation of the Triangle pose where you need to lift your hands perpendicular to the ground. Your pivot joint should be towards the front leg with an open chest. Triangle Twist posture is beneficial for stimulating your organs, eliminating stress, and increasing body balance and stability.
Yoga Level: Intermediate
How to Do Triangle Twist (Parivrtta Trikonasana)?
Step 1: Start with the Triangle pose.
Step 2: Keep your right arm down to the ground.
Step 3: Twist your body and open your left side.
Step 4: Lift your left arm towards the sky and gaze upwards.
Step 5: Hold the position for a few moments and release.
Step 6: Repeat the same with the other leg.
What Are the Safety Precautions to Take While Performing Triangle Twist?
- Beginners should keep their heads in a neutral position instead of rising upwards.
- Stop practising if you face any pain during the posture.
- Avoid it if you have neck or back pain.
Who Should Avoid Practising Parivrtta Trikonasana?
- People with low blood pressure, breathing trouble, and heart diseases.
- People who have sleeping disorders and migraines.
- Who has recently undergone spine, back, or neck surgery.
11. Crescent Lunge (Ashta Chandrasana)
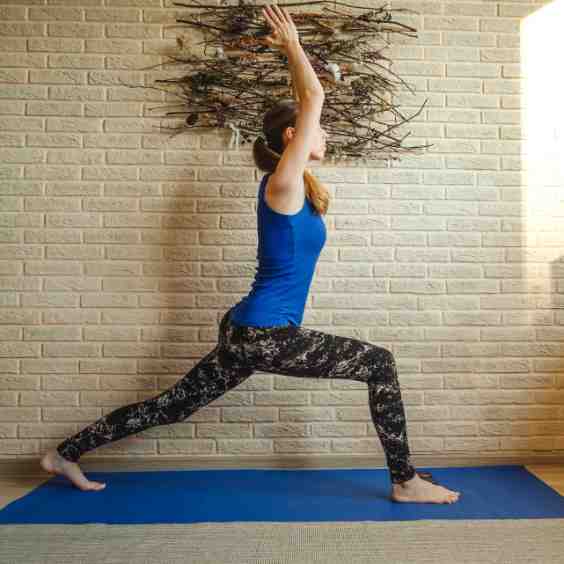
Ashta Chandrasana can be considered as the preparatory pose for Virabhadrasana. In this posture, you need to bend one knee and stretch another leg backwards while keeping the hands at a 90-degree angle upwards. Therefore, this standing yoga asana is helpful for body stretching and body balance.
Yoga Level: Advanced
How to Do Crescent Lunge (Astha Chandrasana)?
Step 1: Stand straight and stretch your right leg forward and left leg backward.
Step 2: Bend your right knee and lift your left toe.
Step 3: Slowly lift your hands overhead and fix your gaze on your front.
Step 4: Hold the position for a few moments, release, and repeat with the opposite leg.
What Are the Safety Precautions to Take While Performing a Crescent Lunge?
- Aged people should take help from a wall.
- Avoid practising if you have a back or neck injury.
- Avoid it if you have a tendon injury.
Who Should Avoid Practising Ashta Chandrasana?
- Menstruating women should not perform this posture.
- People who have hip surgery.
- People who have severe neck pain and headaches.
12. Natarajasana (Dancer Pose)
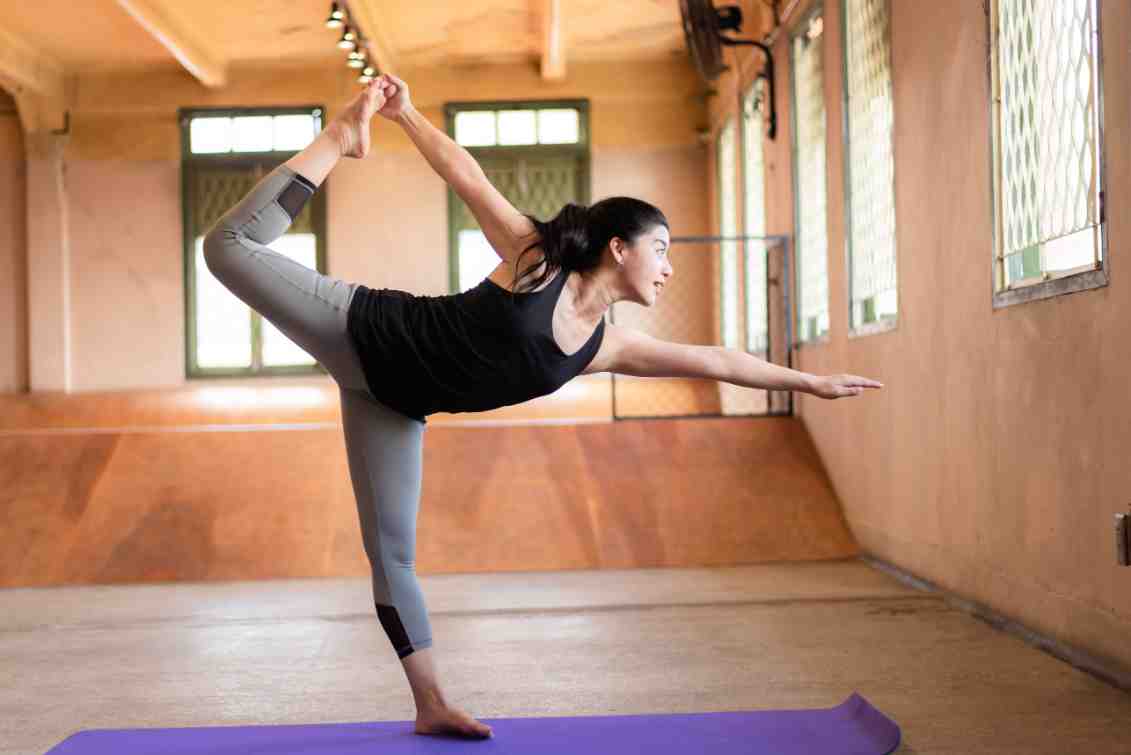
Dancer Pose is a traditional yoga pose reflecting a deep connection with spirituality. The posture helps to stretch your body and strengthen your legs and arms. Further, it is also helpful in strengthening your glute and core muscles.
Yoga Level: Intermediate
How to Do a Natarajasana (Dancer Pose)?
Step 1: Start with Tadasana and stretch your left leg to the front.
Step 2: Raise your left hand upward.
Step 3: Lift your right leg behind you and grab it by your big toe.
Step 4: Bend down forward to take your right leg upward while maintaining body balance.
Step 5: Hold this position for a few moments and release.
Step 6: Repeat with the other leg.
What Are the Safety Precautions to Take While Performing Natarajasana?
- You should refrain from practising this pose if you have poor body balance.
- Do not twist your hip; instead, just pull your legs properly.
- Stop practising if you face any pain while performing the posture.
Who Should Avoid Practising Natarajasana?
- Arthritis patients.
- People with injured legs, neck, hip, or back.
- People with slipped disc and carpal tunnel syndrome.
13. Chair Pose (Utkatasana)
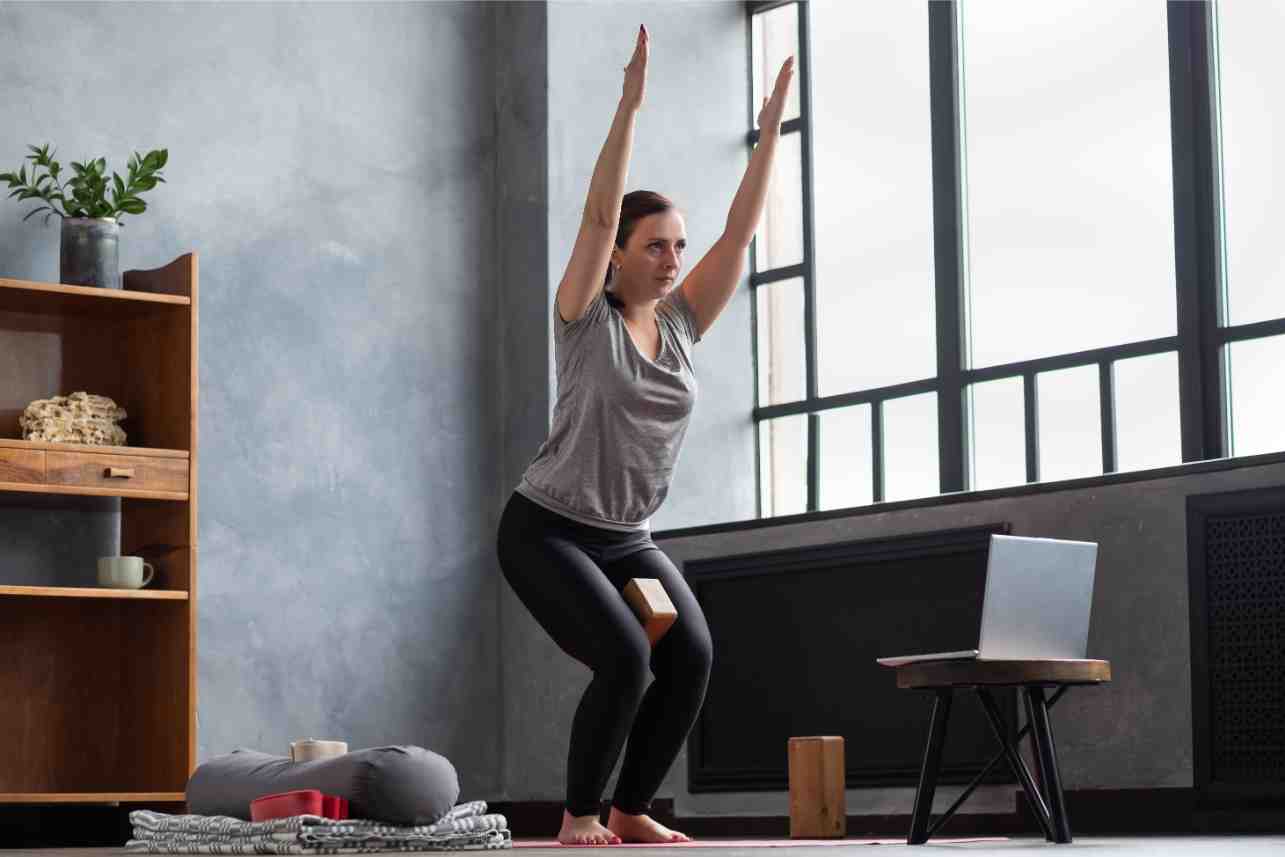
Utkatasana is a simple yoga pose where you need to bend your lower back resembling the shape of a chair. The pose energises your body and helps tighten your leg muscles, strengthen your core muscles, and boost your mental freshness.
Yoga Level: Intermediate
How to Do Chair Pose (Utkatasana)?
Step 1: Stand in the Tadasana position.
Step 2: With lifted arms, keep your hips down.
Step 3: Do a half squat as if sitting on an imaginary chair.
Step 4: Hold this position for a few breaths and release.
What Are the Safety Precautions to Take While Performing Chair Pose?
- Keep your posture correct while performing the pose.
- Avoid if you have knee pain.
Who Should Avoid Practising Utkatasana?
- People who have insomnia or headaches.
- People who have arthritis or low blood pressure.
14. Figure-4 Chair Pose (Eka Pada Utkatasana)
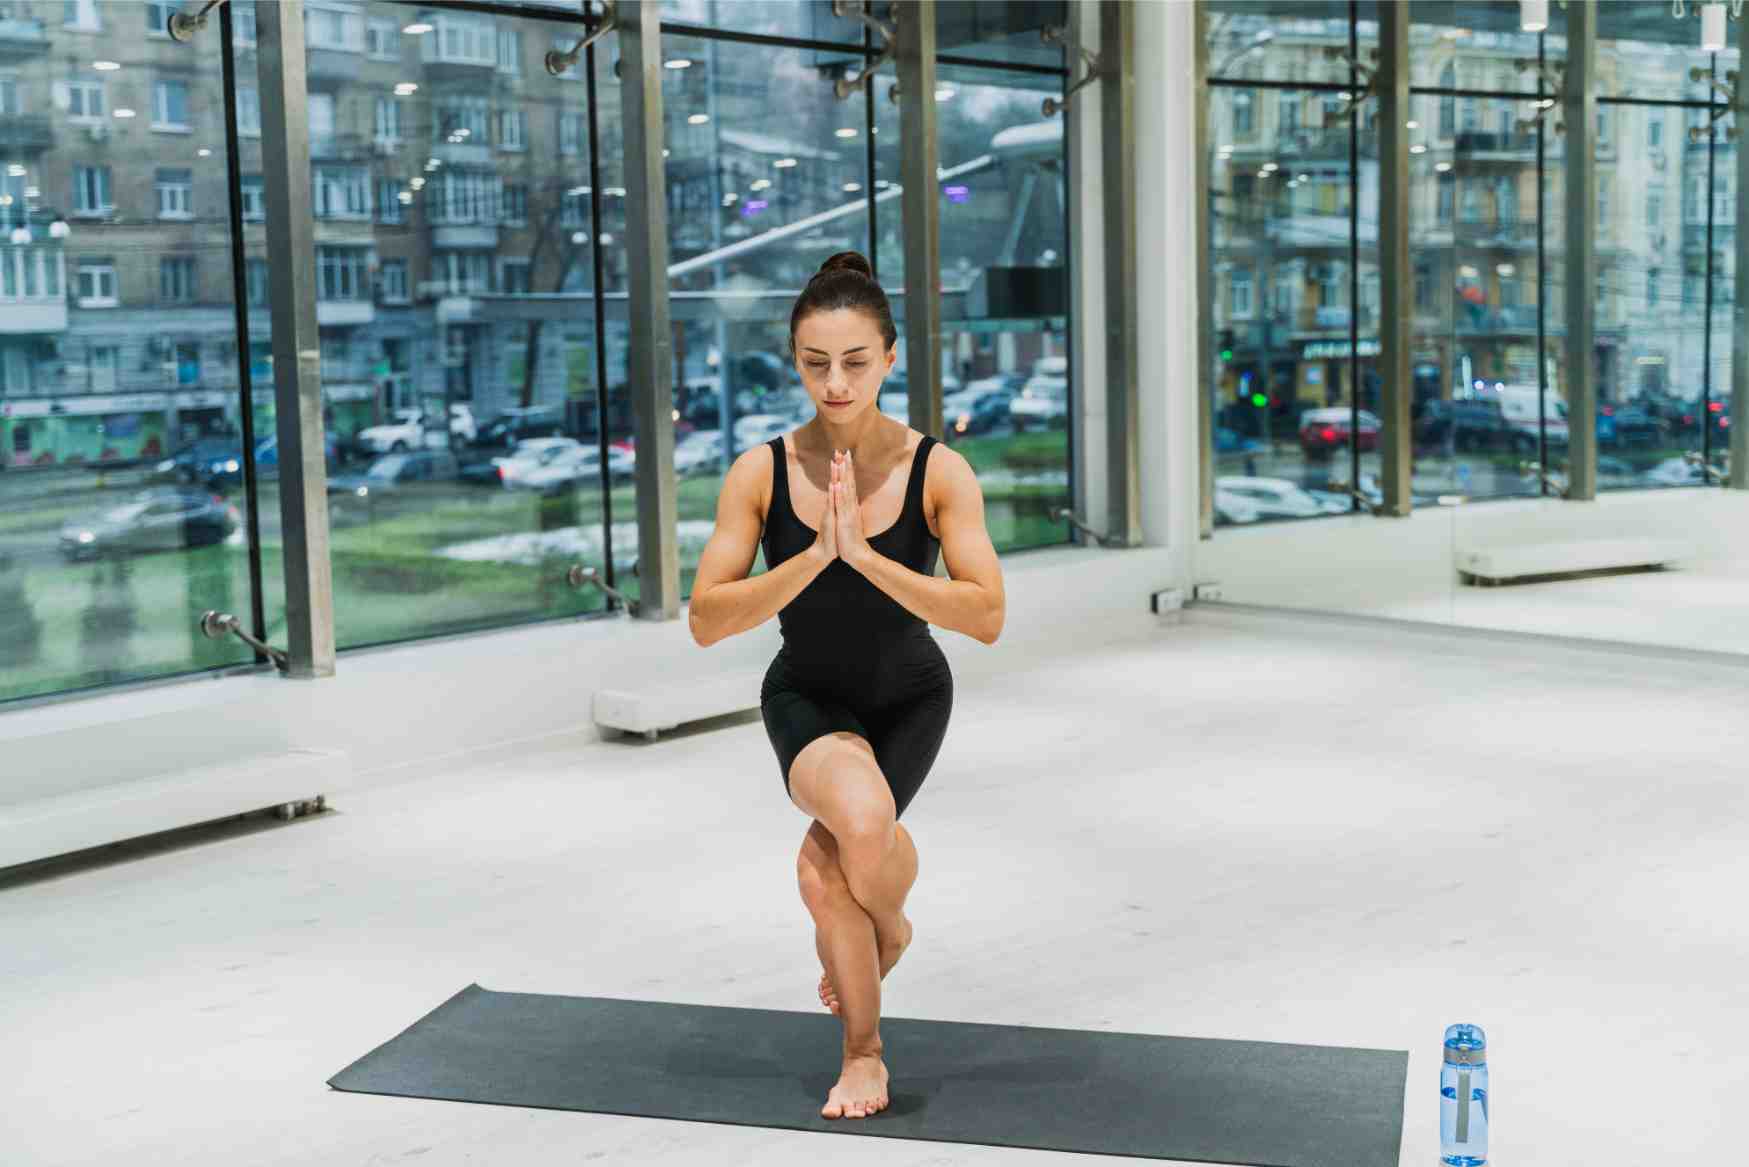
Figure-4 chair pose is an extreme body balancing pose where practitioners should fold one leg and pose like sitting on a chair. The pose is beneficial for getting better balance, strong legs, and toned hip muscles.
Yoga Level: Intermediate
How to Do Figure-4 Chair Pose (Eka Pada Utkatasana)?
Step 1: Stand straight on a yoga mat.
Step 2: Keep the left leg rooted on the ground.
Step 3: Lift your right leg and put it under the left thigh.
Step 4: Lower into a chair pose.
Step 5: Hold for a few moments, release and repeat with the other leg.
What Are the Safety Precautions to Take While Performing Figure-4 Chair Pose?
- Do not bend your knees too much.
- Do not arch your hip too much.
Who Should Avoid Practising Figure-4 Chair Pose (Eka Pada Utkatasana)?
- People with low blood pressure.
- Pregnant women.
15. Crescent Lunge and Cactus Arm (Astha Chandrasana and Cactus Arm)
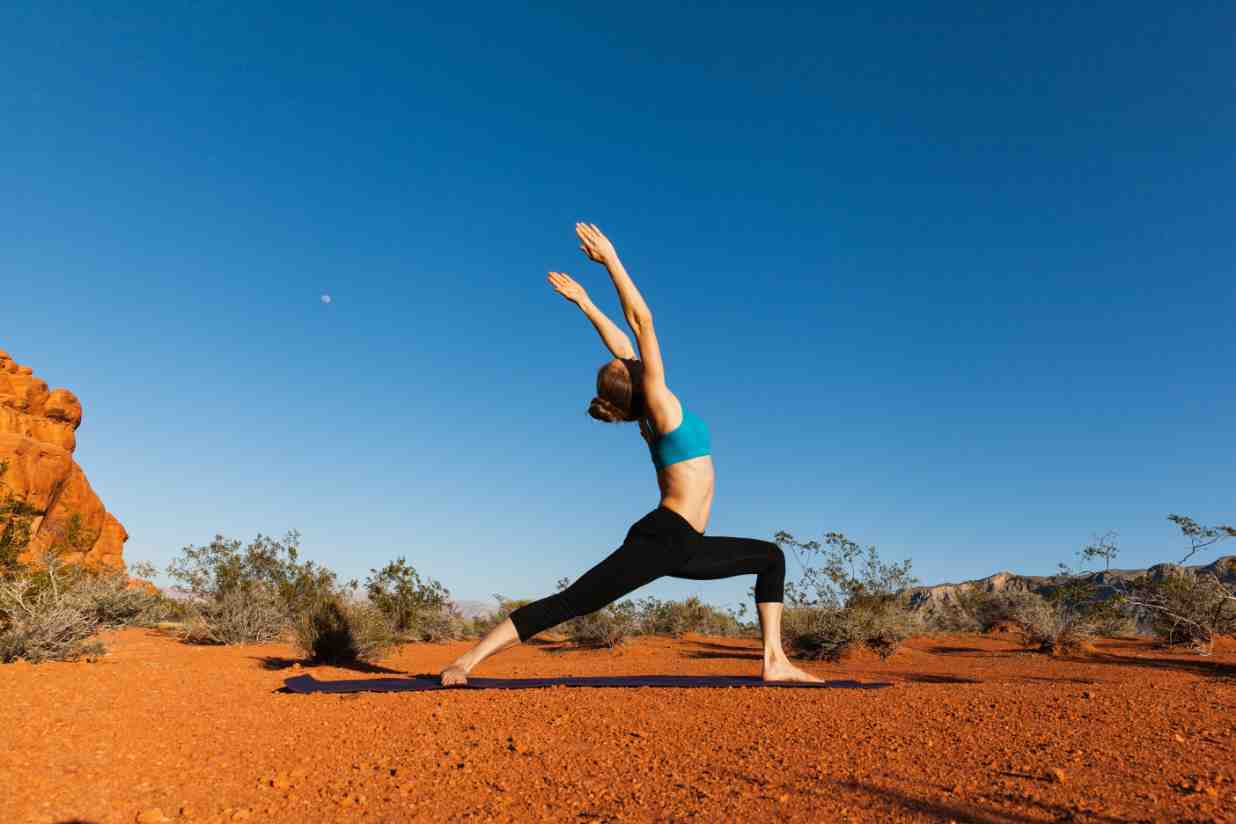
Crescent Lunge and Cactus Arm is a variation of Ashta Chandrasana. In this posture, the practitioner opens up the chest and keeps the lower part of his body like Astha Chandrasana. This yoga pose is also helpful for body balance and strengthening the muscles like the glutes, hamstrings, hips etc.
Yoga Level: Beginner
How to Do Crescent Lunge and Cactus Arm (Ashta Chandrasana and Cactus Arm)?
Step 1: Stand in the high lunge position, putting the right foot forward.
Step 2: Place your left toe behind and press your toes on the mat.
Step 3: Raise your arms and slowly lower down your elbows.
Step 4: Hold for a few moments, release and repeat with the other leg.
What Are the Safety Precautions to Take While Performing Crescent Lunge and Cactus Arm?
- Avoid practising if you have poor body balance.
- Take care of weak ankles, knees and shoulders while performing.
- Do not practise if you have a knee injury.
Who Should Avoid Practising Ashta Chandrasana and Cactus Arm?
- People with short-breath issues
- Surgical patients
- Pregnant and postnatal women
- Aged people
16. Garudasana (Eagle Pose)
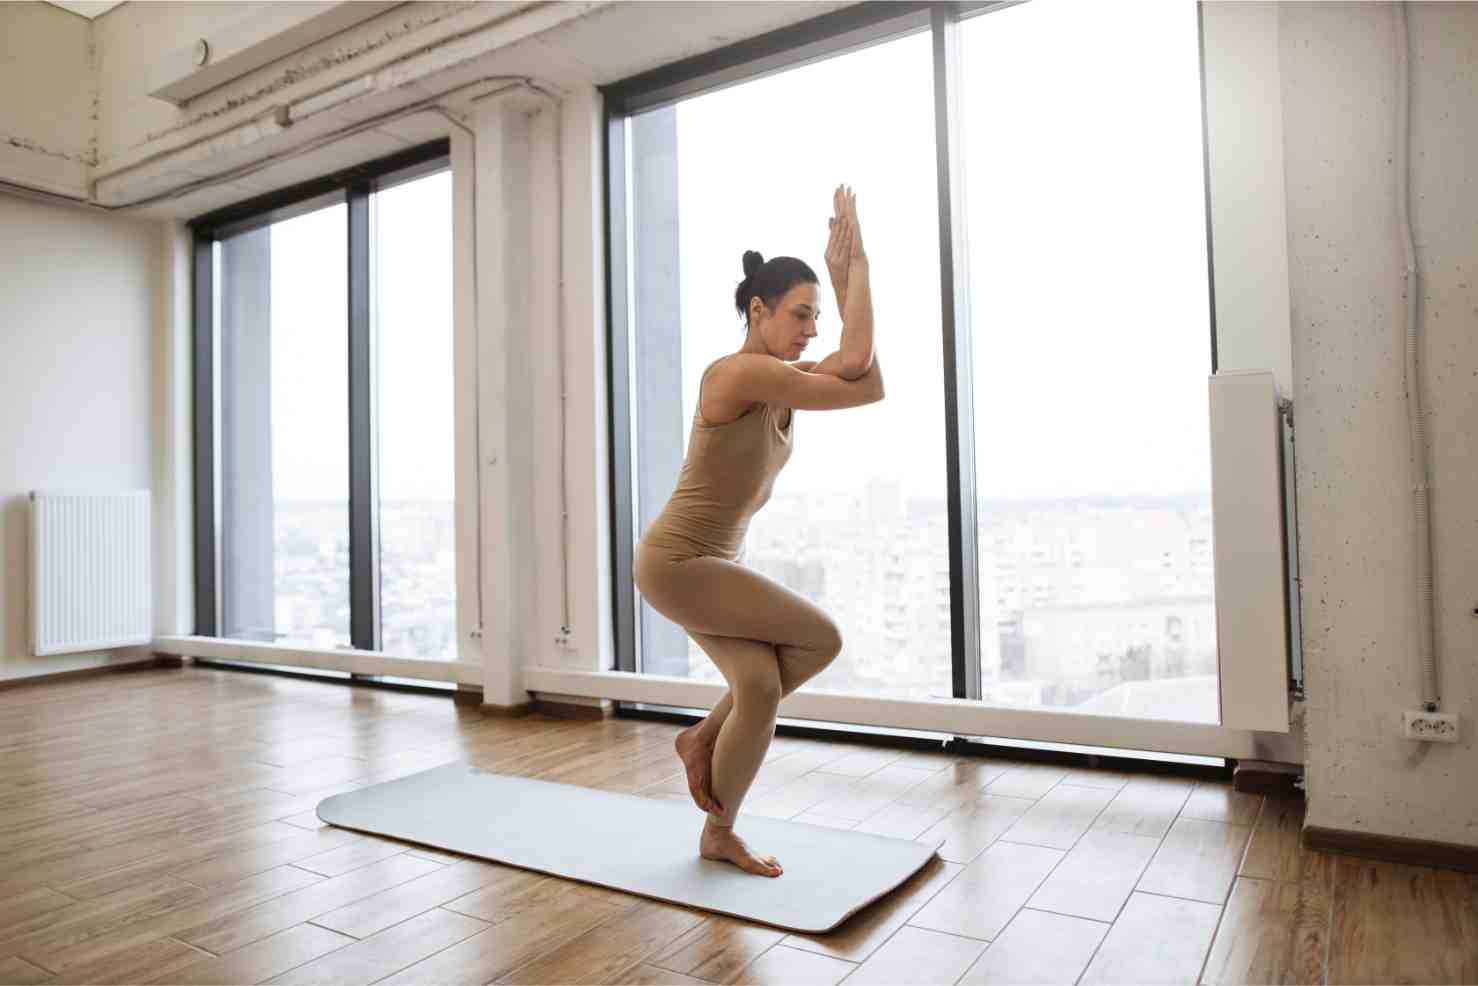
Garudasana, or Eagle Pose, is a standing balance pose that involves wrapping one leg around the other while intertwining the arms. This pose strengthens the legs, opens the shoulders, and improves concentration.
Yoga Level: Beginner
How to Do Garudasana (Eagle Pose)?
Step 1: Stand with your feet hip-width apart and arms by your sides.
Step 2: Lift your right leg and cross it over the left thigh.
Step 3: Wrap your right foot around the left calf if possible.
Step 4: Cross your left arm over the right arm at the elbows, then bring your palms together if possible.
Step 5: Hold for several breaths, then repeat on the opposite side.
What Are the Safety Precautions to Take While Performing Garudasana (Eagle Pose)?
- Be cautious if you have knee or ankle injuries.
- Avoid forcing the legs or arms into a deep cross if it causes discomfort.
Who Should Avoid Practising Garudasana (Eagle Pose)?
- Individuals with knee or ankle injuries.
- Those with balance issues or vertigo.
- Pregnant women, especially in later stages.
17. Utthita Parsvakonasana (Extended Side Angle Pose)
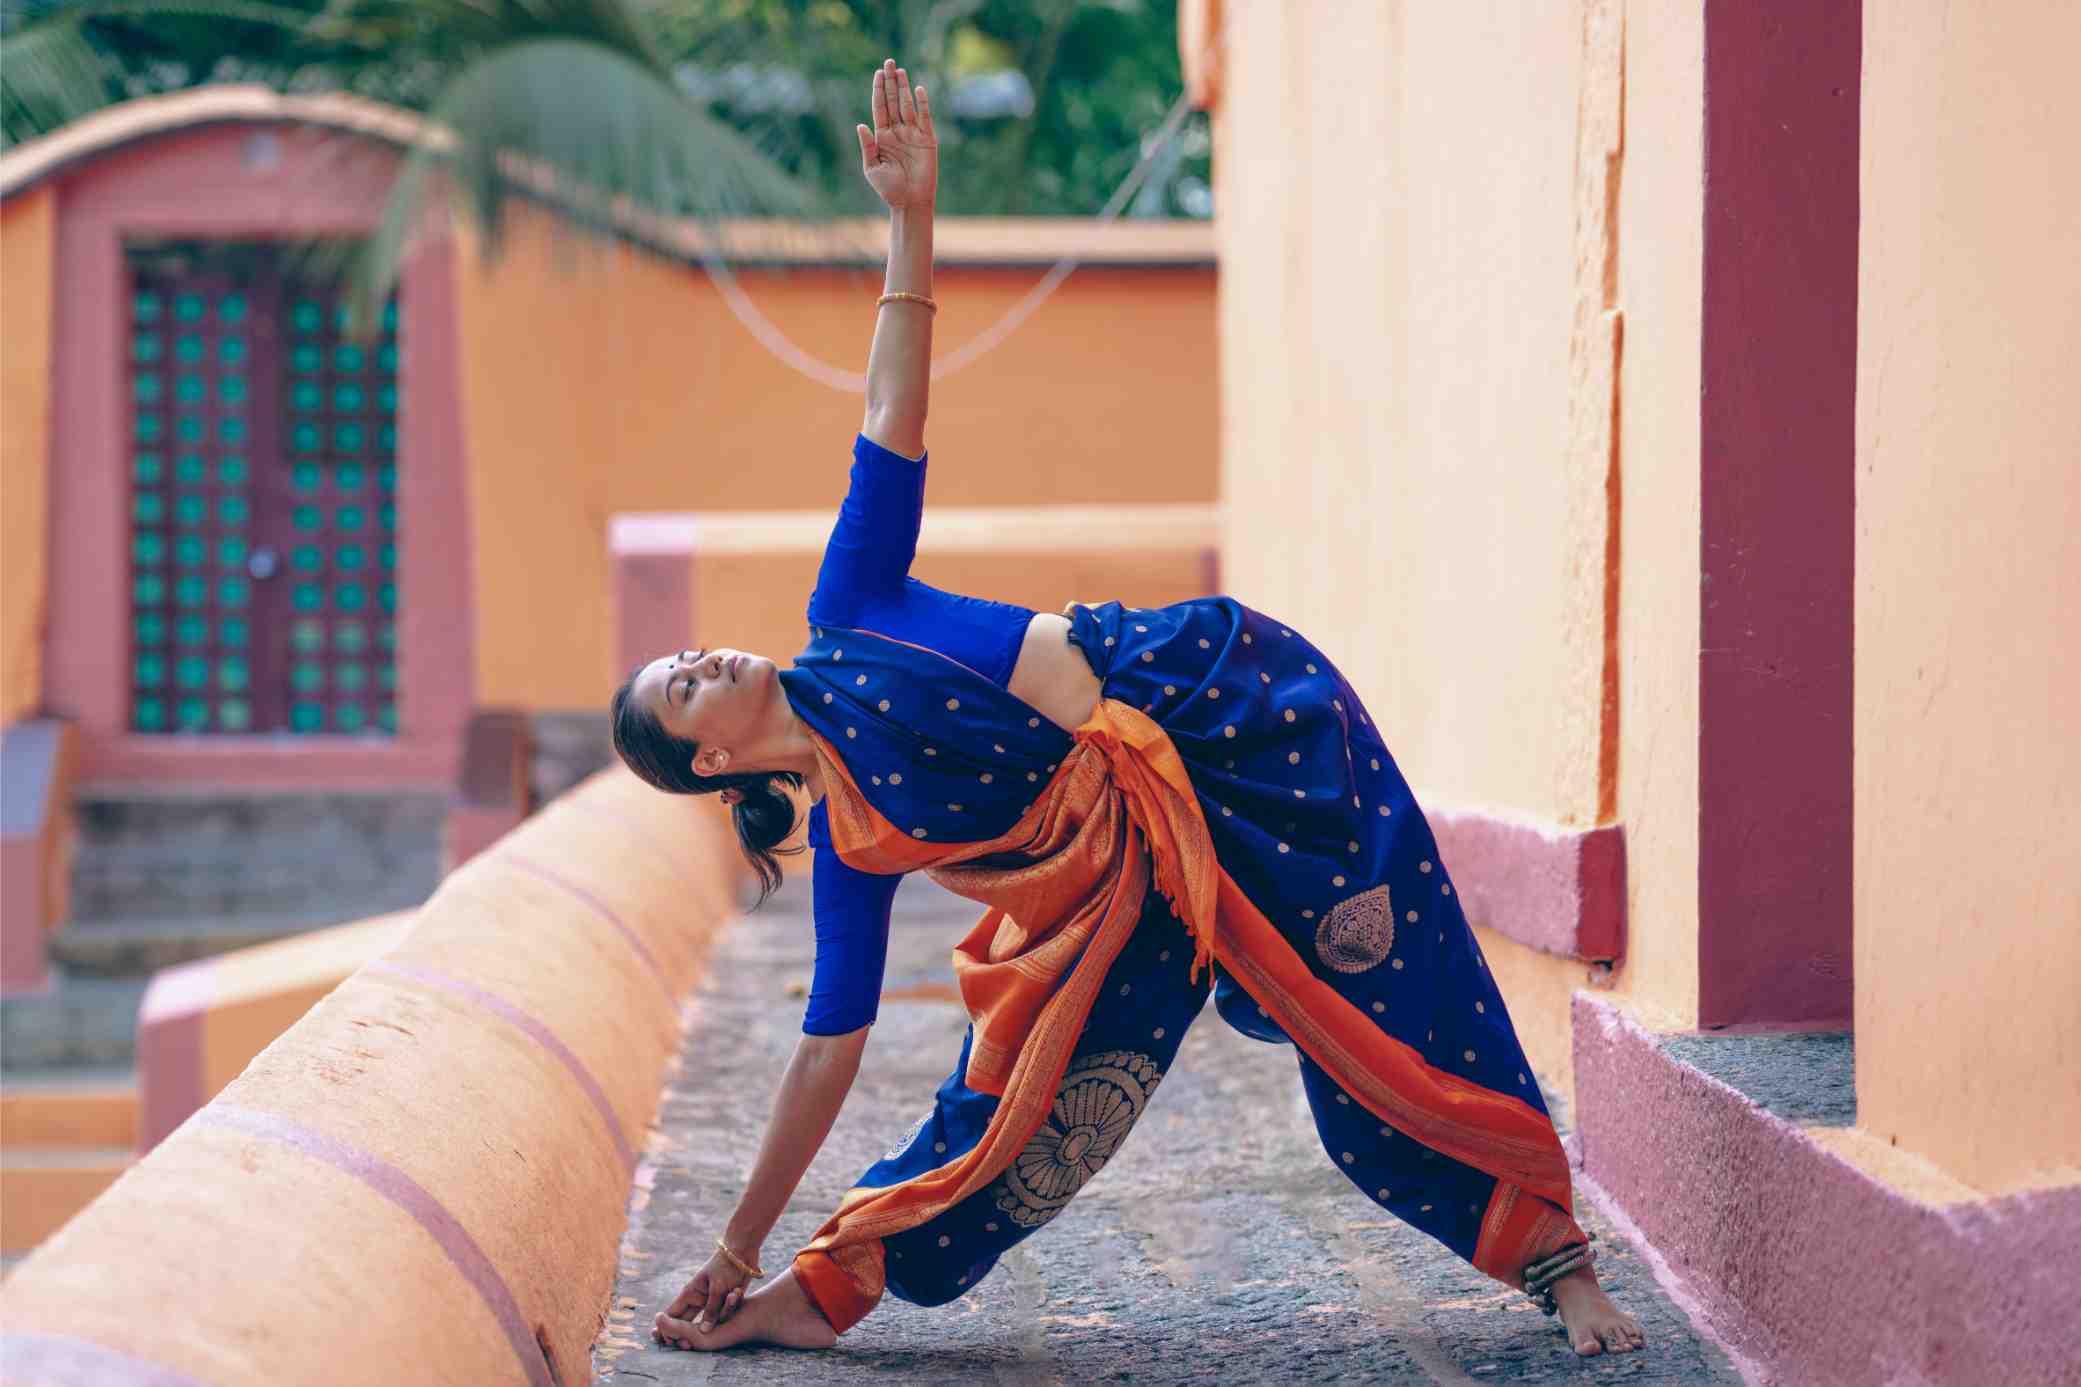
Utthita Parsvakonasana, or Extended Side Angle Pose, is a standing pose that stretches the side body while strengthening the legs and core. This pose improves flexibility in the hips and spine while energising the entire body.
Yoga Level: Beginner
How to Do Utthita Parsvakonasana (Extended Side Angle Pose)?
Step 1: Begin in Warrior II pose with your right leg forward and left leg back.
Step 2: Extend your right arm forward, then lower your right hand to the floor or a block outside your right foot.
Step 3: Extend your left arm overhead, reaching towards the front of the room.
Step 4: Keep your right knee bent at a 90-degree angle, aligning it over your ankle.
Step 5:Press into the outer edge of your left foot and engage your core to support the pose.
Step 6: Hold for several breaths, then switch sides.
What Are the Safety Precautions to Take While Performing Utthita Parsvakonasana?
- Avoid if you have hip or shoulder injuries.
- Keep the knee aligned over the ankle to avoid strain on the knee joint.
Who Should Avoid Practising Utthita Parsvakonasana?
- Individuals with hip or shoulder injuries.
- Those with high blood pressure or heart conditions.
- Pregnant women, especially in the second and third trimesters.
18. Kati Chakrasana (Standing Spinal Twist)
Kati Chakrasana, or Standing Spinal Twist, is a standing pose that enhances spinal mobility and stimulates digestion. This pose improves flexibility in the spine, shoulders, and hips while releasing tension in the lower back.
Yoga Level: Beginner
How to Do Kati Chakrasana (Standing Spinal Twist)?
Step 1: Begin standing with feet hip-width apart and arms extended to the sides.
Step 2: Inhale to lengthen the spine, then exhale and twist to the right, bringing the left hand to the outside of the right knee and the right hand behind the back.
Step 3: Keep the hips facing forward and the knees aligned.
Step 4: Hold for a few breaths, then inhale to return to the centre and repeat on the other side.
What Are the Safety Precautions to Take While Performing Kati Chakrasana?
- Move gently into the twist, avoiding any sudden or jerky movements.
- Keep the knees soft and avoid locking them during the twist.
Who Should Avoid Practising Kati Chakrasana?
- Individuals with a herniated disc or severe spinal injury.
- Those with chronic back pain or inflammation.
- Pregnant women, especially in the second and third trimesters.
19. Reverse Warrior (Viparita Virabhadrasana)
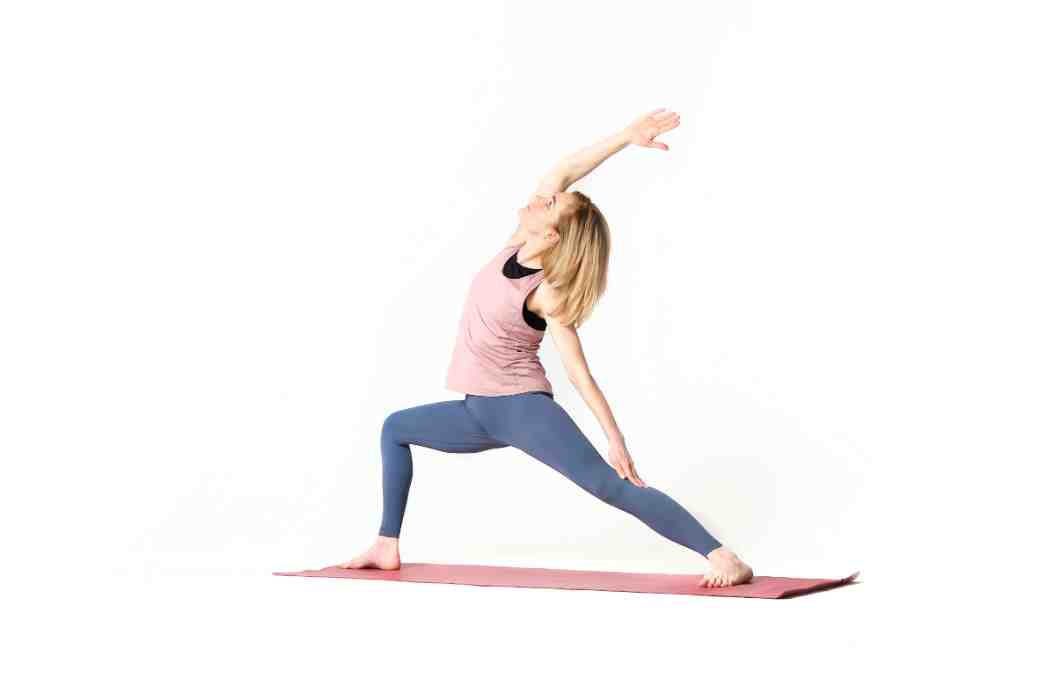
Reverse Warrior, or Viparita Virabhadrasana, is a standing pose that stretches the side body while building strength in the legs and core. This pose improves flexibility in the spine, shoulders, and hips while increasing mental focus and concentration.
Yoga Level: Intermediate
How to Do a Reverse Warrior (Viparita Virabhadrasana)?
Step 1: Begin in Warrior II pose with your right leg forward and left leg back.
Step 2: Inhale and reach your right arm up towards the ceiling, keeping your right knee bent and stacked over the ankle.
Step 3: Slide your left hand down your back leg, reaching towards the back foot.
Step 4: Keep your torso facing the side, with your hips squared towards the front of the mat.
Step 5: Lengthen through the side body, reaching up through the fingertips and down through the back heel.
Step 6: Hold for several breaths, then switch sides.
What Are the Safety Precautions to Take While Performing Reverse Warrior?
- Keep the front knee aligned over the ankle to avoid strain on the knee joint.
- Engage the core muscles to support the spine and prevent overarching.
Individuals with hip or shoulder injuries. Those with high blood pressure or heart conditions.
- Individuals with hip or shoulder injuries.
- Those with high blood pressure or heart conditions.
- Pregnant women, especially in the second and third trimesters.
20. Utthita Hasta Padangusthasana (Extended Hand-To-Big-Toe Pose)
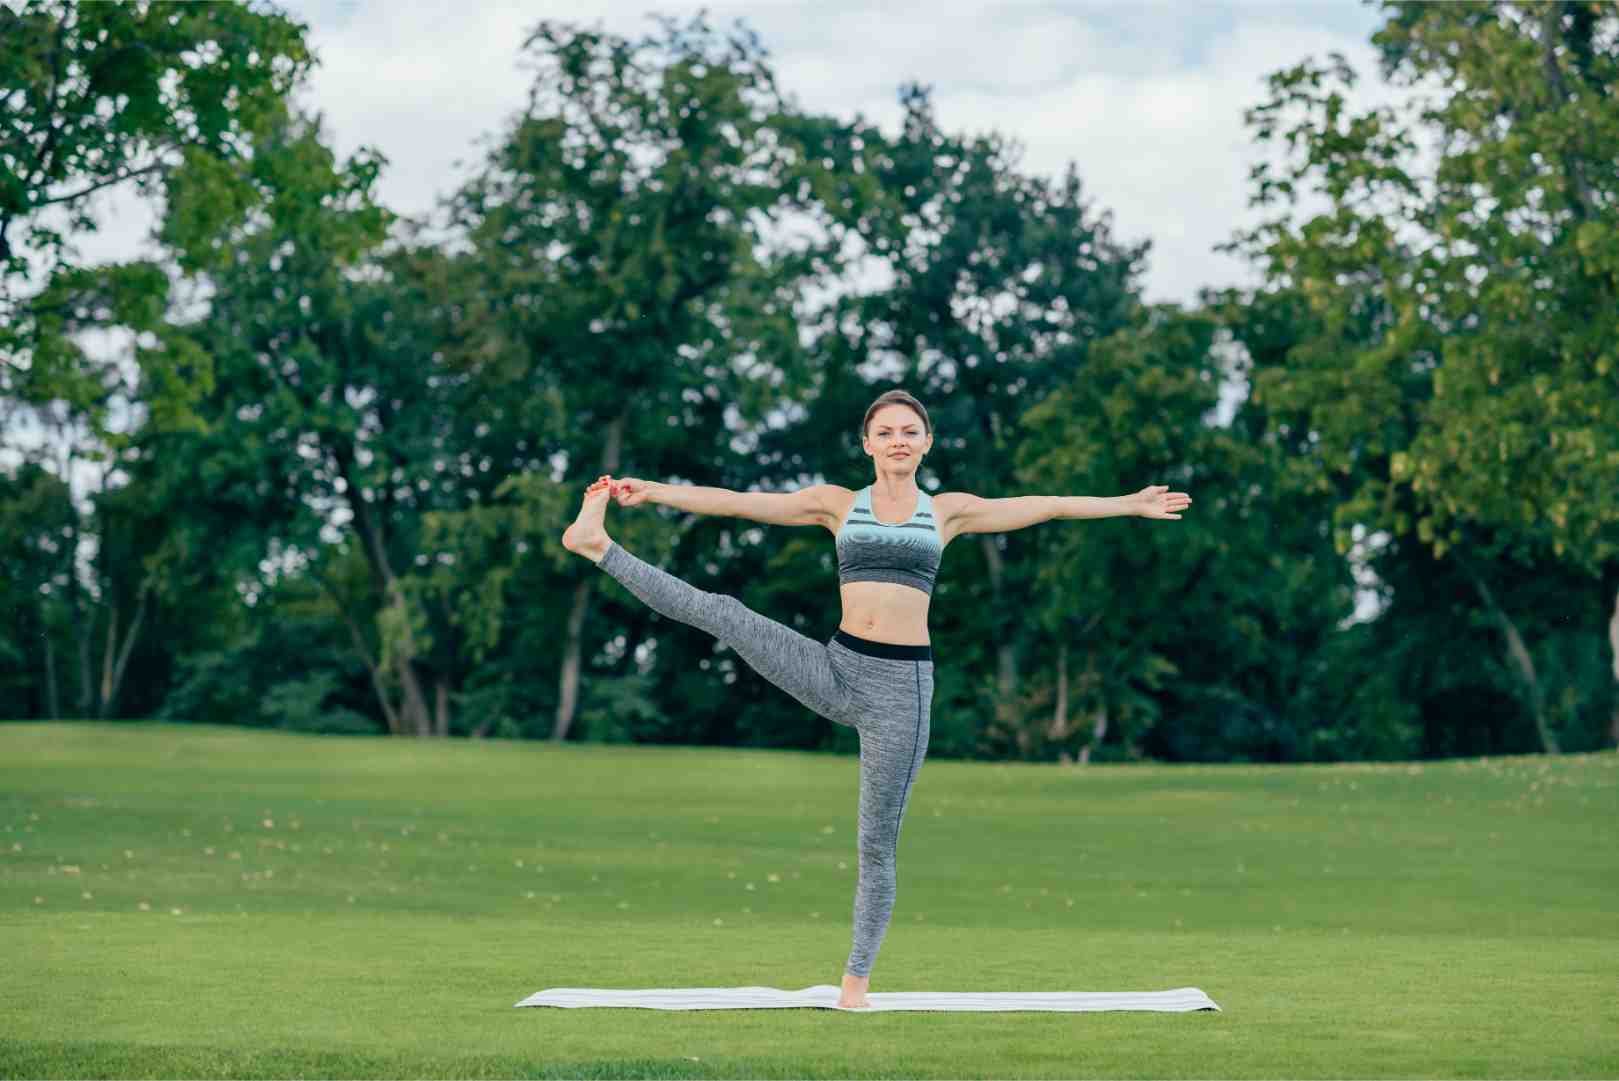
Utthita Hasta Padangusthasana, or Extended Hand-To-Big-Toe Pose, is a standing balance pose that improves focus, concentration, and flexibility. This pose strengthens the legs and core while enhancing coordination and balance.
Yoga Level: Intermediate to Advanced
How to Do Utthita Hasta Padangusthasana?
Step 1: Begin standing tall with your feet together and arms by your sides.
Step 2: Shift your weight onto your left foot and lift your right foot off the ground.
Step 3: Bend your right knee and grab the big toe with your right hand.
Step 4: Straighten your right leg out in front of you, keeping the torso upright.
Step 5: Hold for several breaths, then release and switch sides.
What Are the Safety Precautions to Take While Performing Utthita Hasta Padangusthasana?
- Use a strap around the foot if unable to reach the toe comfortably.
- Keep the standing leg strong and engaged to maintain balance.
Who Should Avoid Practising Utthita Hasta Padangusthasana?
- Individuals with ankle or knee injuries.
- Those with balance issues or vertigo.
- Pregnant women, especially in later stages.
Thus, the above list contains some of the best standing yoga poses that can help your body in many ways. Mostly, these poses are suitable for enhancing your balance and increasing your mental freshness. Besides, they are also considered beneficial stretching exercises that strengthen your muscles and help you to get a flexible body.
Benefits of Doing Standing Yoga Poses Daily
Engaging in a daily practice of standing yoga poses offers many physical, mental, and emotional benefits. Here are some compelling reasons why incorporating these poses into your routine can positively impact your overall well-being:
Physical Strength and Flexibility: Standing yoga poses target major muscle groups such as the legs, core, and upper body, helping to build strength and endurance over time. Additionally, these poses enhance flexibility.
Improved Balance and Stability: Standing yoga poses challenge proprioception and coordination, strengthen muscles around the ankles and feet, reduce the risk of falls, and promote overall body awareness.
Stress Relief and Relaxation: Engaging in standing yoga poses alleviates stress and promotes relaxation. The mindful nature of these poses serves as a moving meditation, calming the mind and fostering inner peace.
Enhanced Concentration and Mental Clarity: Standing yoga poses requires concentration and focus to align the body and maintain balance. This mental engagement sharpens attention and improves memory.
Emotional Balance and Resilience: Practising standing yoga poses fosters greater emotional intelligence and resilience by cultivating presence and acceptance. This allows individuals to navigate challenges with grace.
Energy Boost and Vitality: Standing yoga poses stimulate circulation and activate the body's energy centres, invigorating and rejuvenating practitioners. They also promote overall well-being and vitality.
For quite some time, adding standing yoga poses to a daily routine has been known to improve the general health and well-being of individuals largely. Engaging in these asanas will enhance your physical strength, flexibility, and balance and encourage mental clarity and emotional stability.
Furthermore, mindfulness meditation and relaxation techniques intrinsic to yoga can help reduce stress and anxiety and lead to a more tranquil life.


