10 Inversion Yoga Poses to Plan Your Yoga Sequence
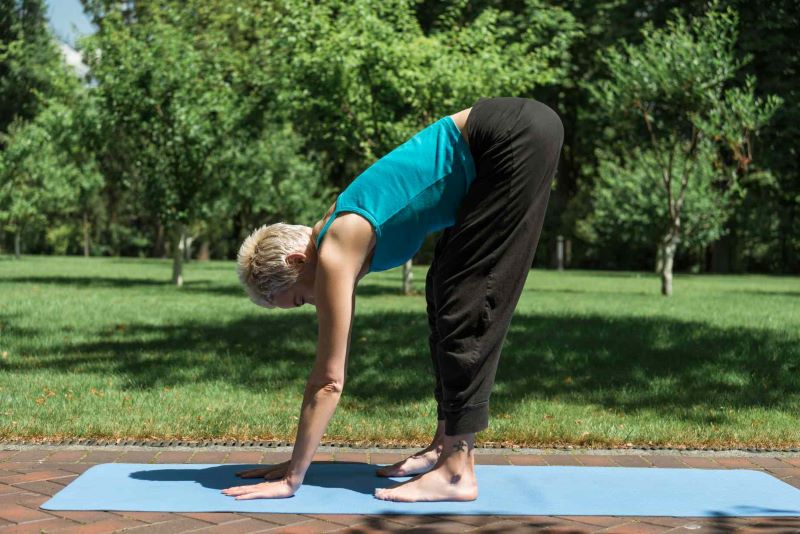
Inversion yoga poses are an effective solution for boosting the body’s natural healing process. They help with proper blood flow throughout the whole body, thus activating different organs and increasing their activities. In addition, multiple inversion yoga poses can benefit you in some way or another.
Go through this article to learn about these poses and other details.
Top Inversion Yoga Poses
Inversion yoga poses can improve circulation, boost energy, and enhance mental clarity. There are many types, from beginner-friendly downward-facing dog to more advanced handstands and plough poses.
1. Forward Fold Pose - Uttanasana
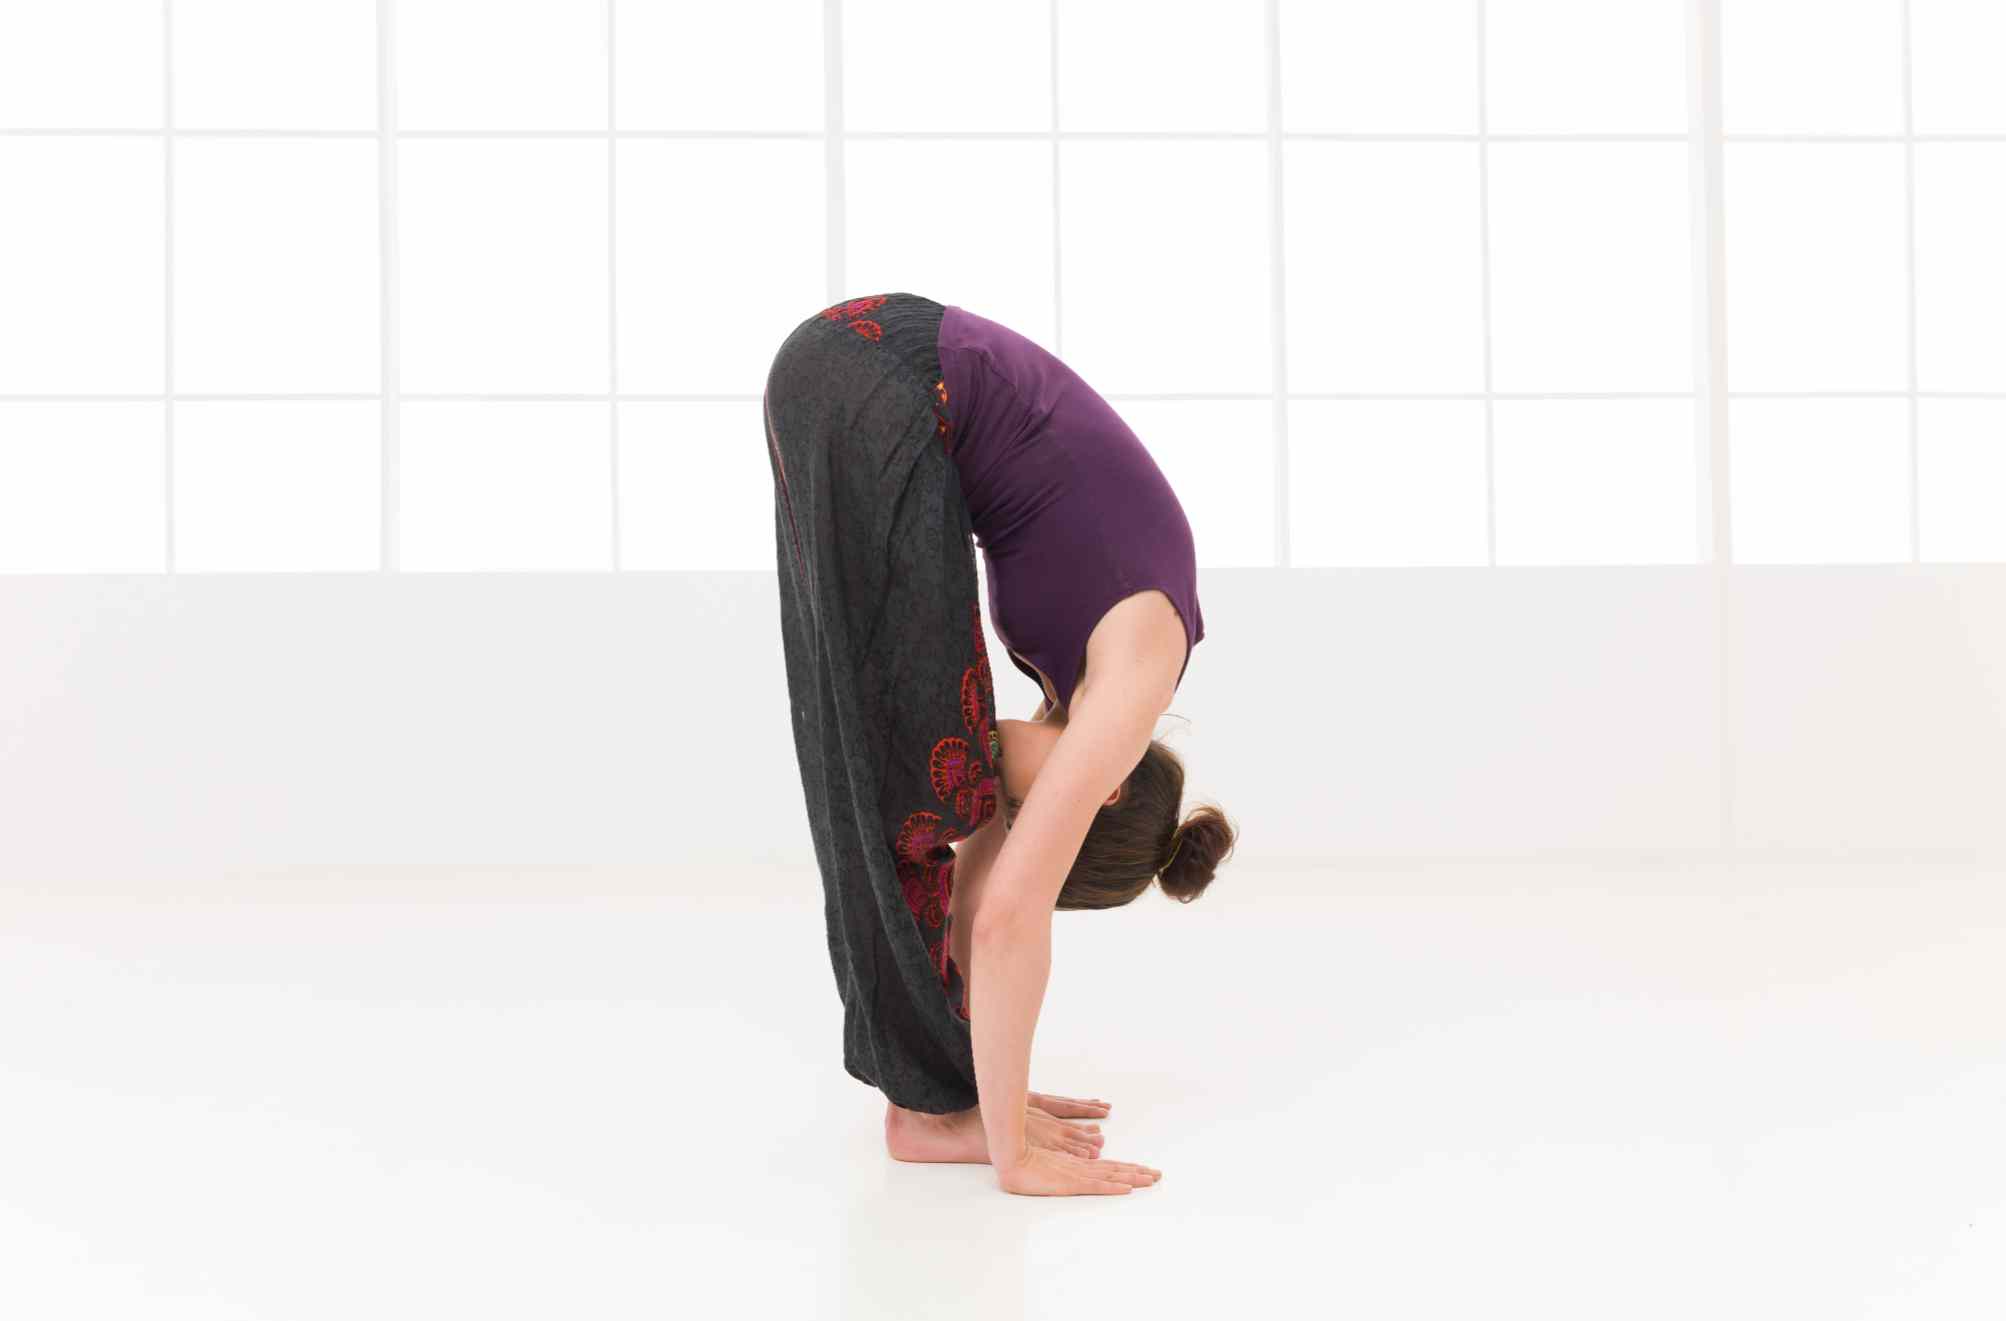
Forward fold pose or Uttanasana, is a simple yet effective body-bending yoga posture. In this posture, you bend your upper body downward and touch the ground with your palms. This pose effectively allows blood flow to the brain, strengthening core muscles and toning the lower back muscles. Further, it retains the spine’s flexibility and is helpful for weight loss.
Yoga Level: Beginner
How to Do Uttanasana?
Step 1: Stand straight, resting your hands by your side.
Step 2: Exhale and bend your body downwards. Your stomach and chest should be in front of your thighs.
Step 3: Try to bring your head to your knees, hold this position for about 20-30 seconds, and breathe normally.
Step 4: Slowly return to your original position while inhaling. Finally, relax and exhale.
What are the Safety Precautions to Take While Performing Uttanasana?
- Always perform a warm-up routine before attempting Uttanasana. This can include gentle stretches or dynamic movements to prepare your muscles and joints.
- Focus on lengthening your spine rather than forcing a deep forward bend. Keep a slight arch in your lower back to maintain a healthy alignment.
- Do not push yourself into a deeper stretch than your body is ready for. Listen to your body and respect its limits.
Who Should Avoid Practising Uttanasana?
- Avoid if you have a wrist injury.
- Avoid it if you are pregnant.
- Refrain from this posture if you are dealing with heart ailments and high blood pressure.
- Avoid if you have a slipped disc or spine injury.
2. Downward-Facing Dog-Pose or Adho Mukha Svanasana
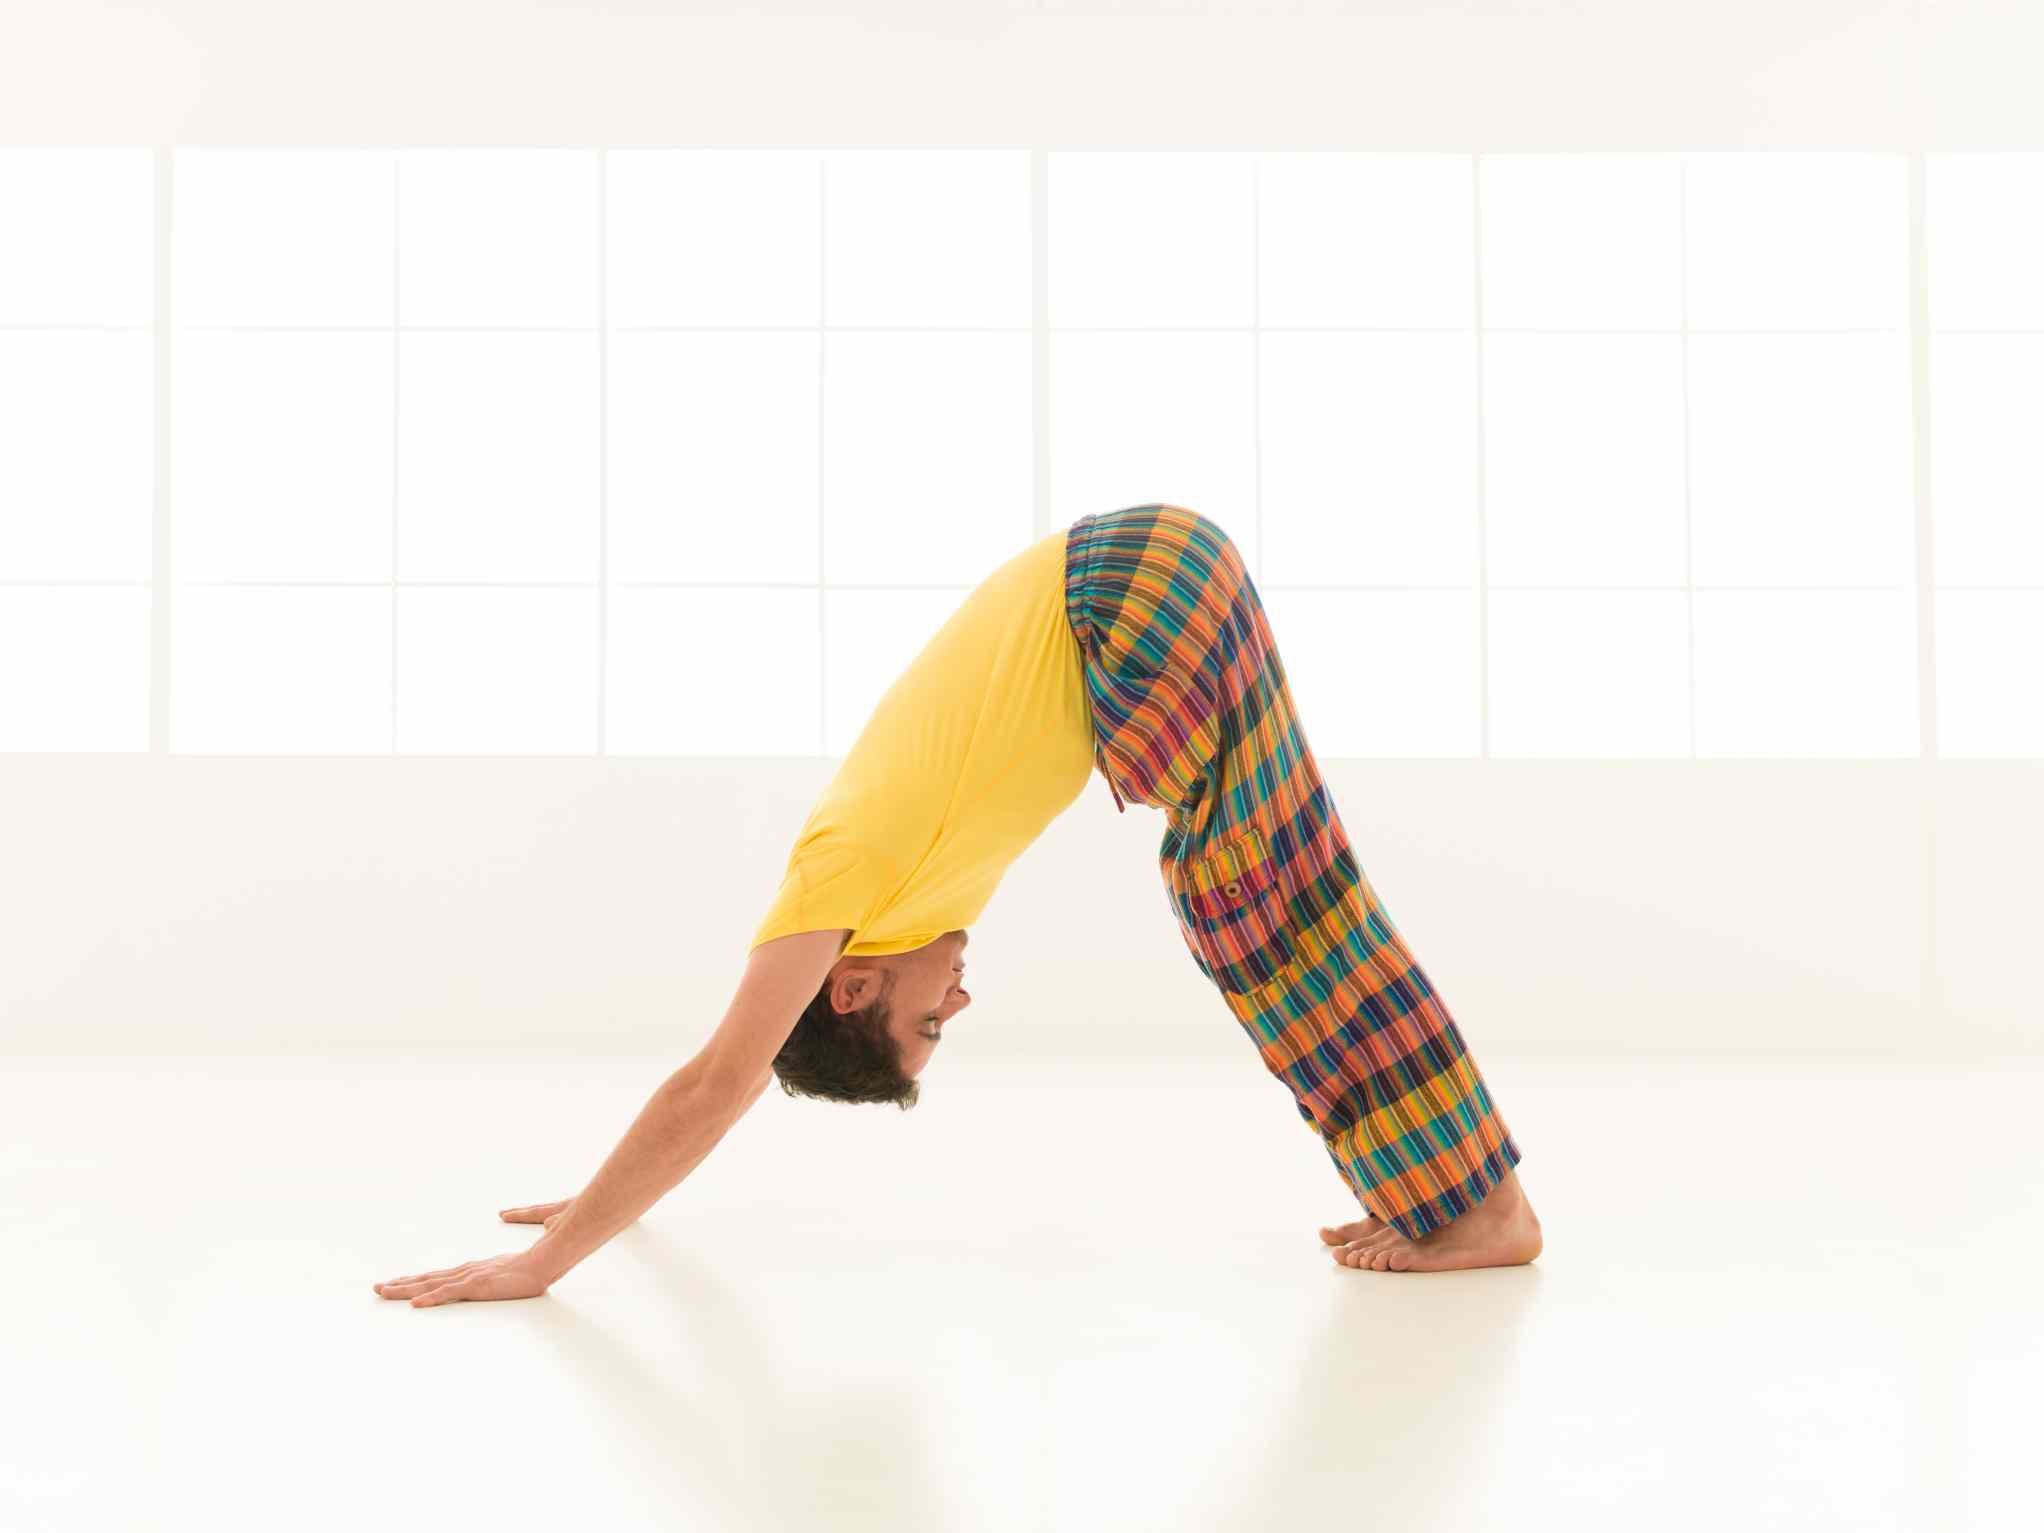
The posture is a part of the traditional sun salutation sequence. This is one of the easiest inversion yoga poses, where you can get benefits like full body stretching, blood flow towards the brain, and strengthening body muscles. Further, the step can be practised as a preparatory pose for several other advanced yoga poses.
Yoga Level: Beginner to Intermediate
How to Do Adho Mukha Svanasana?
Step 1: Sit on your hands and knees with your palms facing downwards.
Step 2: Lift your knees with deep exhaling.
Step 3: Push your thighs upward and stretch your heels.
Step 4: Firmly place your arms on the floor and hold the position briefly.
Step 5: Release and repeat the posture with the other knee.
What are the Safety Precautions to Take While Performing Adho Mukha Svanasana?
- Perform a gentle warm-up routine to prepare your muscles and joints. This can include dynamic stretches or light movements to increase blood flow and flexibility.
- Place your hands shoulder-width apart and your feet hip-width apart.
- Activate your core muscles to support your lower back and maintain stability throughout the pose.
Who Should Avoid Practising Adho Mukha Svanasana?
- People with high blood pressure should avoid headstands
- Menstruating and pregnant women should not practise this posture.
- Refrain from practising this posture if you have headaches or neck or back injury.
- People with heart ailments should not perform headstands.
3. Headstand Pose - Sirsasana
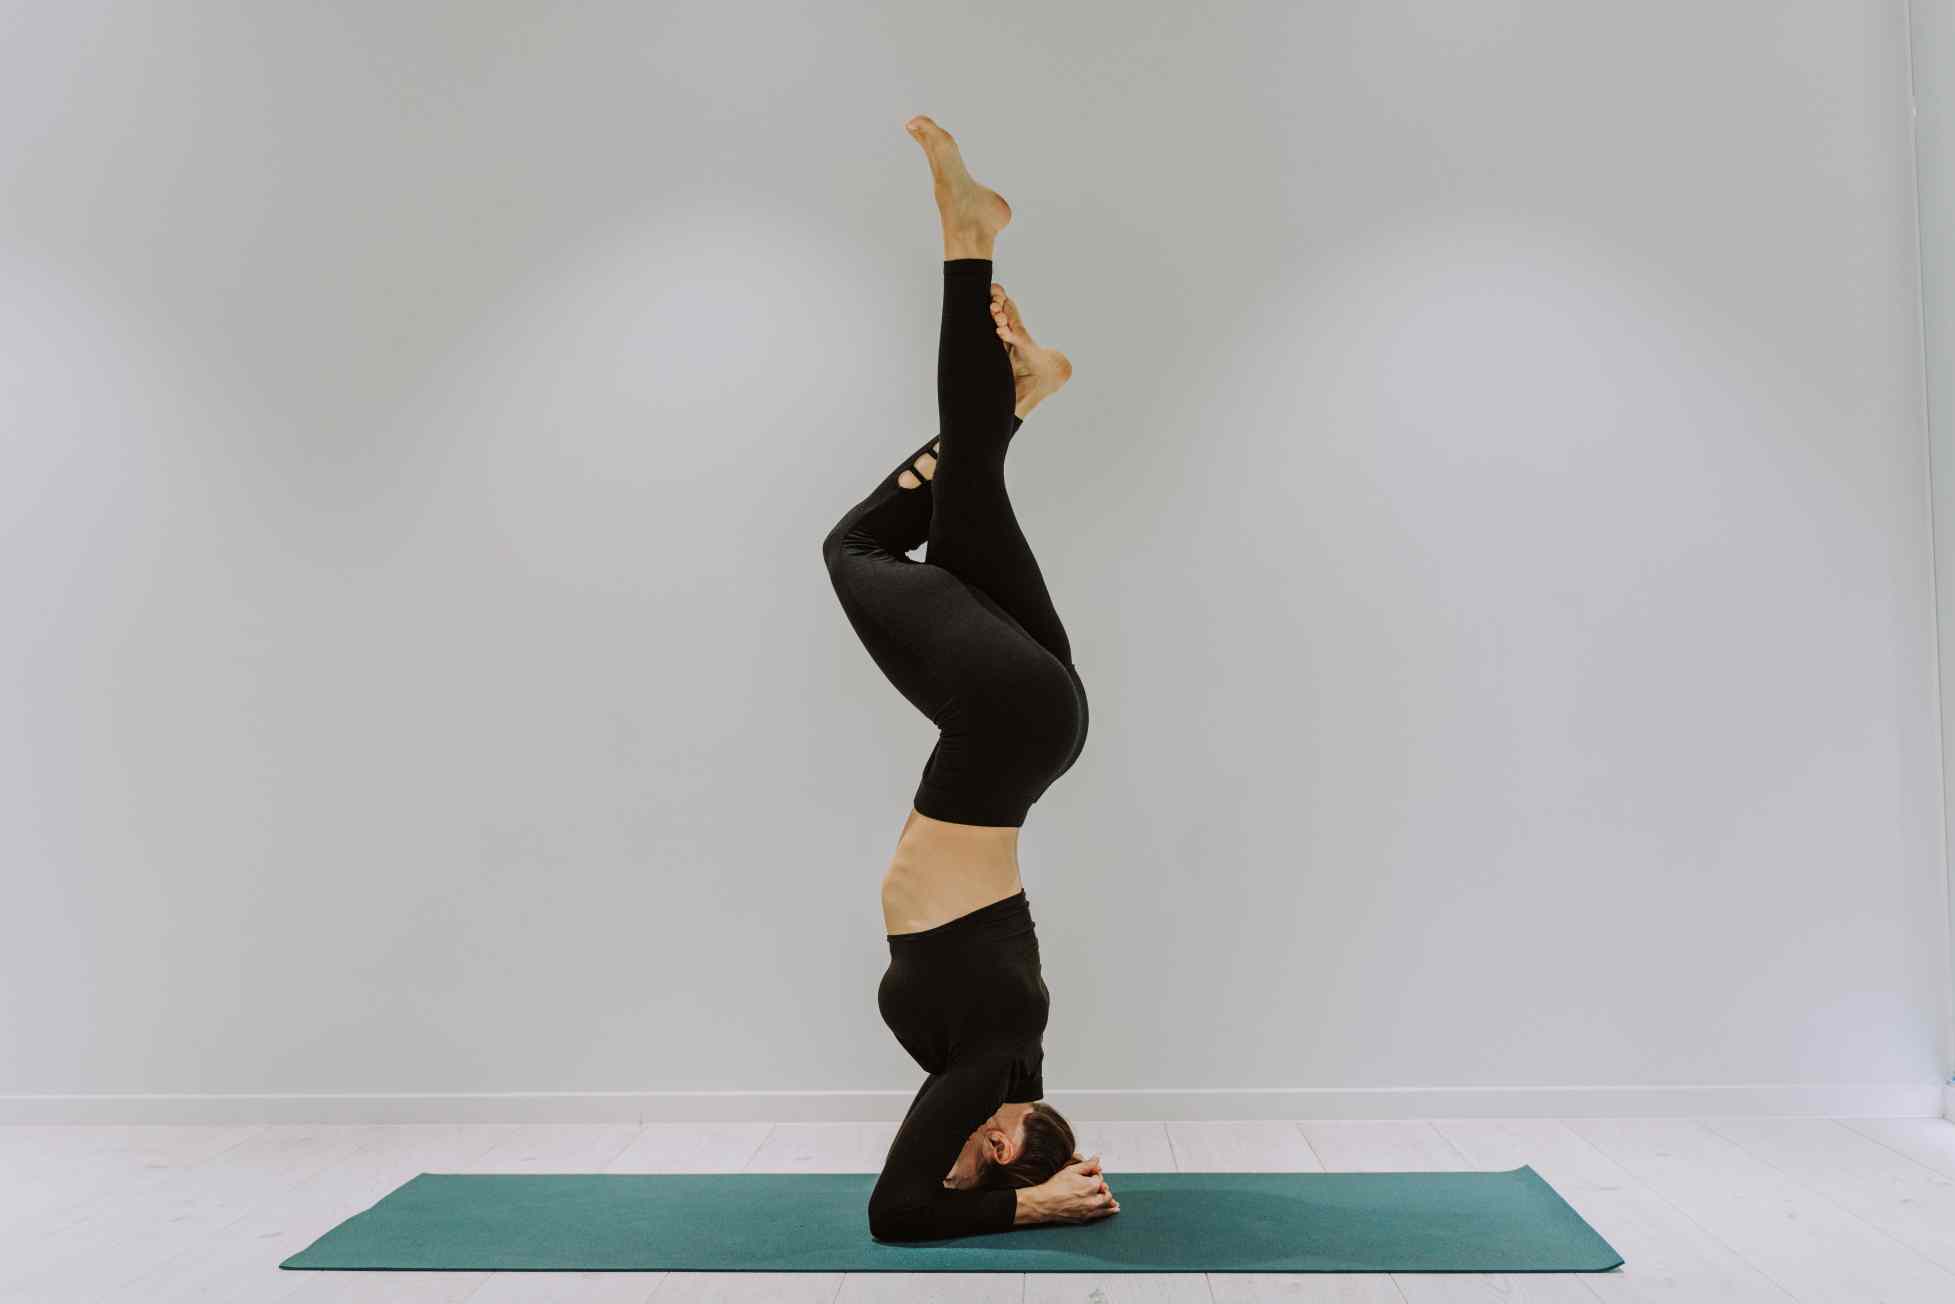
Headstand is a well-known traditional yoga pose that is beneficial for several reasons. If you can perform it perfectly, you can attain high body balance and flexibility. However, in this pose, your whole body will be inverted, and the brain will receive a gush of blood flow. This, in turn, helps the brain obtain adequate blood and nutrients, improving mental and spiritual health.
Yoga Level: Advanced
How to Do Sirsasana?
Step 1: Sit in the thunderbolt position on a soft mat and place your elbows on the ground.
Step 2: Make a triangle with your forearms and lock the fingers of your hands with one another.
Step 3: Place your head inside the triangle for support.
Step 4: Gently raise your hips and legs, making a straight line.
Step 5: Hold the position for 5 seconds and then release slowly.
What are the Safety Precautions to Take While Performing Sirasana?
- If you are new to Sirsasana, learn the pose under the supervision of an experienced yoga instructor to ensure proper alignment and technique.
- Perform a thorough warm-up routine to prepare your muscles and joints. Focus on poses that open the shoulders, stretch the neck, and engage the core.
- Ensure your body is in a straight line, with your shoulders stacked over your elbows and hips over your shoulders.
Who Should Avoid Practising Sirasana?
- People with high blood pressure should avoid headstands
- Menstruating and pregnant women should not practise this posture.
- Refrain from practising this posture if you have headaches or neck or back injury.
- People with heart ailments should not perform headstands.
4. Bridge Pose - Setu Bandha Sarvangasana
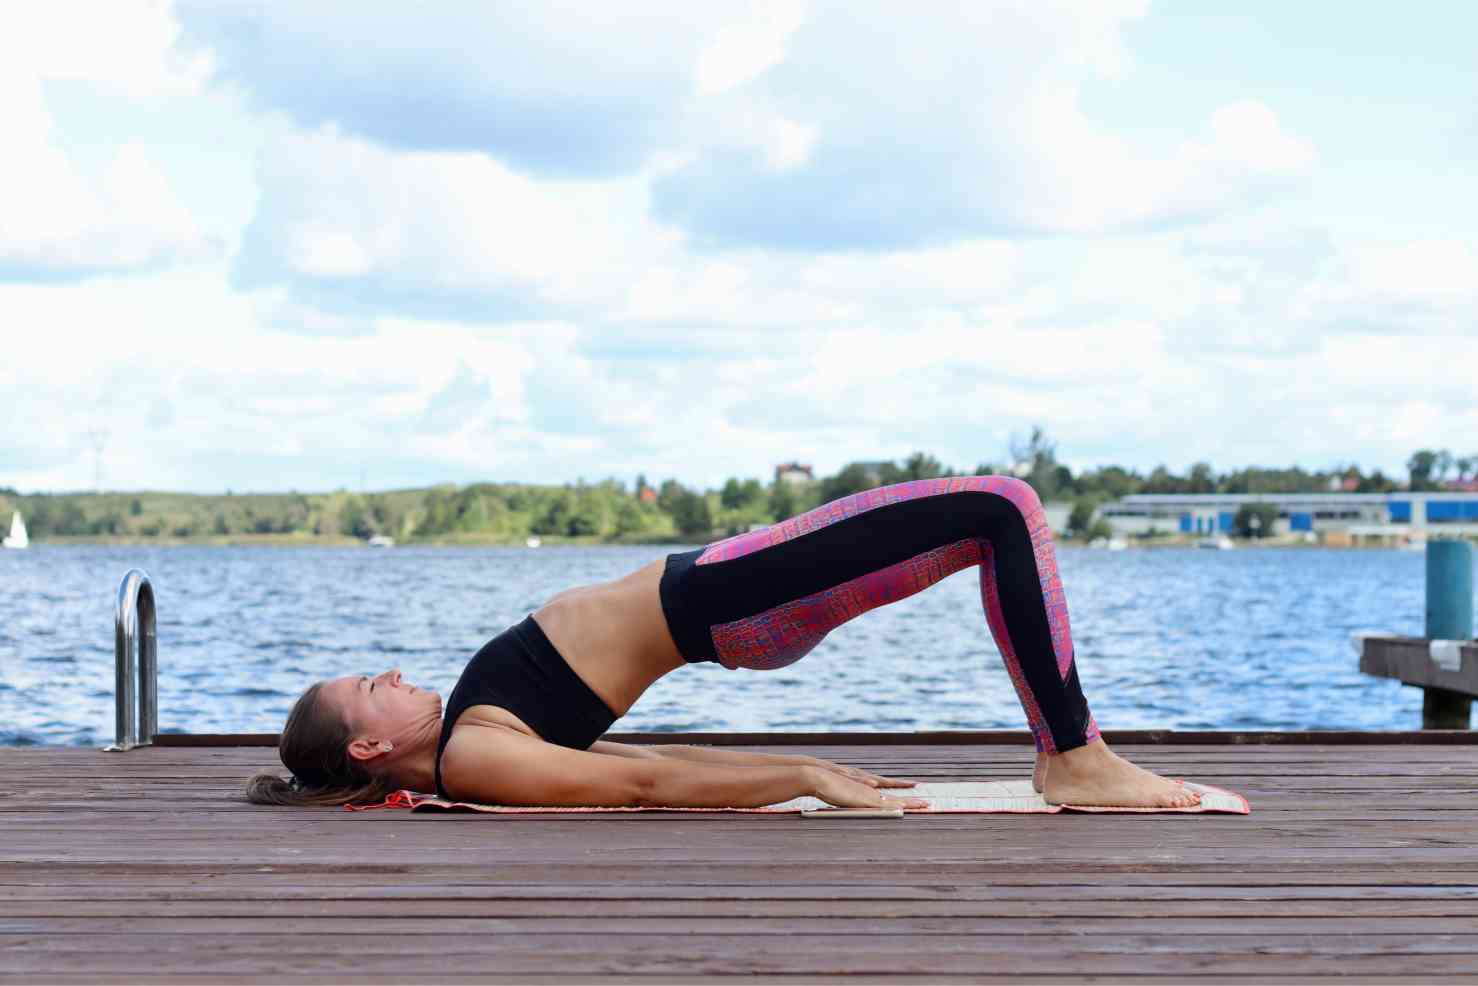
The bridge pose involves a back-bending posture and is one of the easy inversion yoga poses. The posture benefits back pain, asthma, muscle strengthening, etc. In addition, due to its relaxing posture, the bridge pose is a popular preparatory pose for sportspersons and people who perform advanced yoga poses.
Yoga Level: Beginner
How to Do Setu Bandha Sarvangasana?
Step 1: Lay your back on a yoga mat and fold your knees.
Step 2: Rest your arms by your side, keeping the palm facing downwards.
Step 3: Raise your lower back by inhaling slowly.
Step 4: Touch your chin with your chest and hold the position briefly.
Step 5: Keep your breathing steady throughout the process. Then, release the posture and repeat it for some time.
What are the Safety Precautions to Take While Performing Sarvangasana?
- To prepare your muscles and joints for the inversion, perform a thorough warm-up routine focusing on the neck, shoulders, and back.
- If you are new to Sarvangasana, learn the pose under the supervision of an experienced yoga instructor to ensure proper alignment and technique.
- Ensure your shoulders are firmly on the ground and your neck is free from pressure.
Who Should Avoid Practising Sarvangasana?
- Avoid practising this posture if you have neck, back, or knee injuries
- Refrain from practising this posture if you are pregnant.
5. Handstand Pose - Adho Mukha Vrksasana
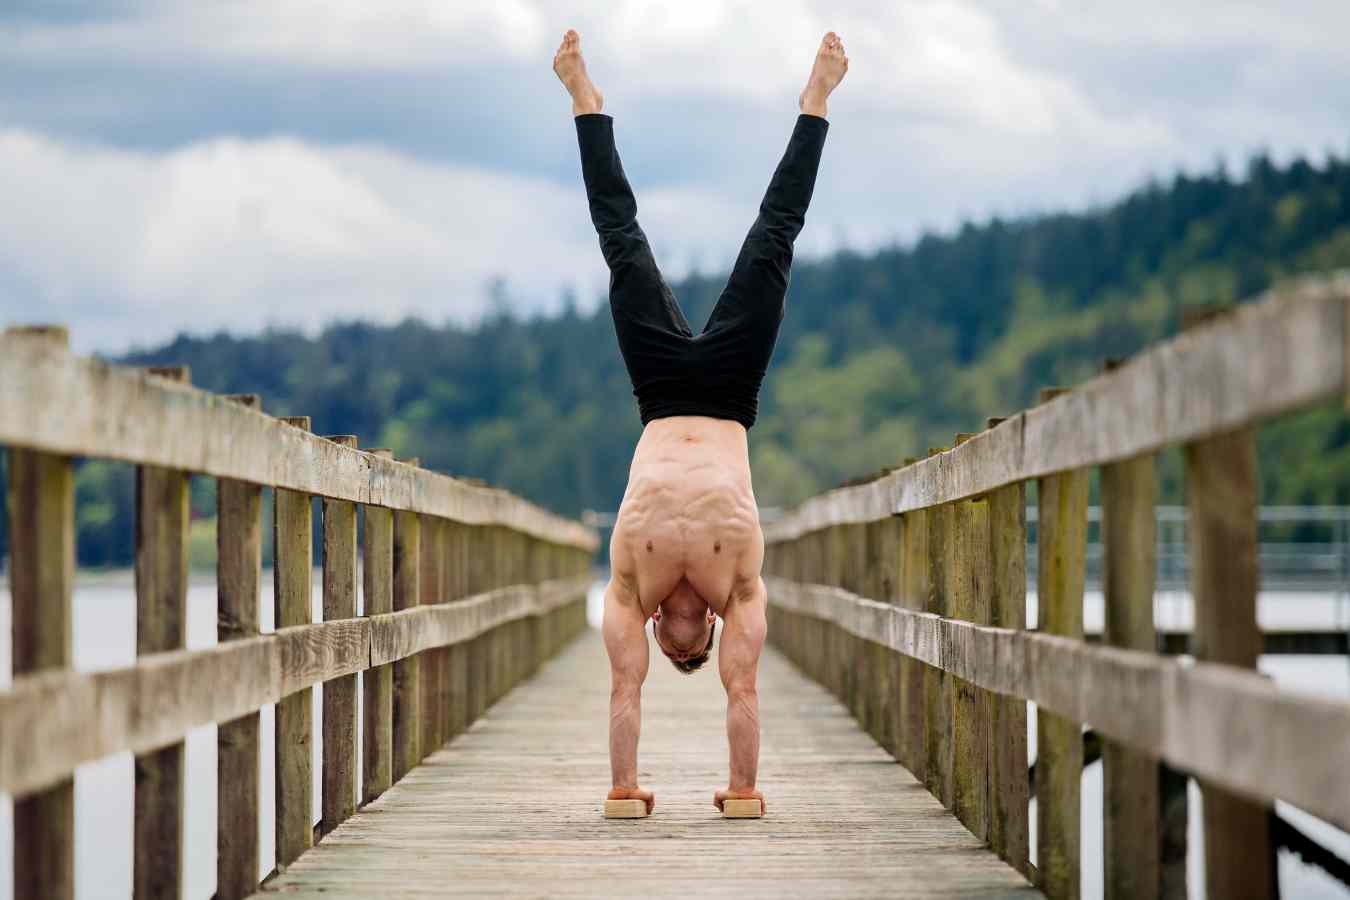
The handstand pose resembles a headstand, but you must invert your whole body on your palms. The position is highly beneficial for releasing tension, gaining body balance, and rejuvenating brain functions. Therefore, besides physical benefits, this posture also helps boost mental health.
Yoga Level: Advanced
How to Do Adho Mukha Vrksasana?
Step 1: Start with a downward-facing dog pose by the side of a wall.
Step 2: Bring your feet and hands close to each other.
Step 3: Start with one leg, bend your knees and try to lift it with the help of the wall.
Step 4: Take a light hop and raise both of your legs upward with the support of the wall.
Step 5: Keep your heels off the wall and hold the position briefly.
Step 6: Release and repeat this posture a few times.
What are the Safety Precautions to Take While Performing Adho Mukha Vrksasana?
- To prepare your muscles and joints for the inversion, perform a thorough warm-up routine focusing on the neck, shoulders, and back.
- If you are new to Sarvangasana, learn the pose under the supervision of an experienced yoga instructor to ensure proper alignment and technique.
- Ensure your shoulders are firmly on the ground and your neck is free from pressure.
Who Should Avoid Practising Adho Mukha Vrksasana?
- Pregnant and menstruating women should avoid practising this posture.
- People with high blood pressure and cardiovascular disease should avoid this posture.
- People who suffer from anxiety and depression should refrain from practising this posture.
- If you have a back injury or recent surgery, you should avoid this posture.
6. Plough Pose - Halasana
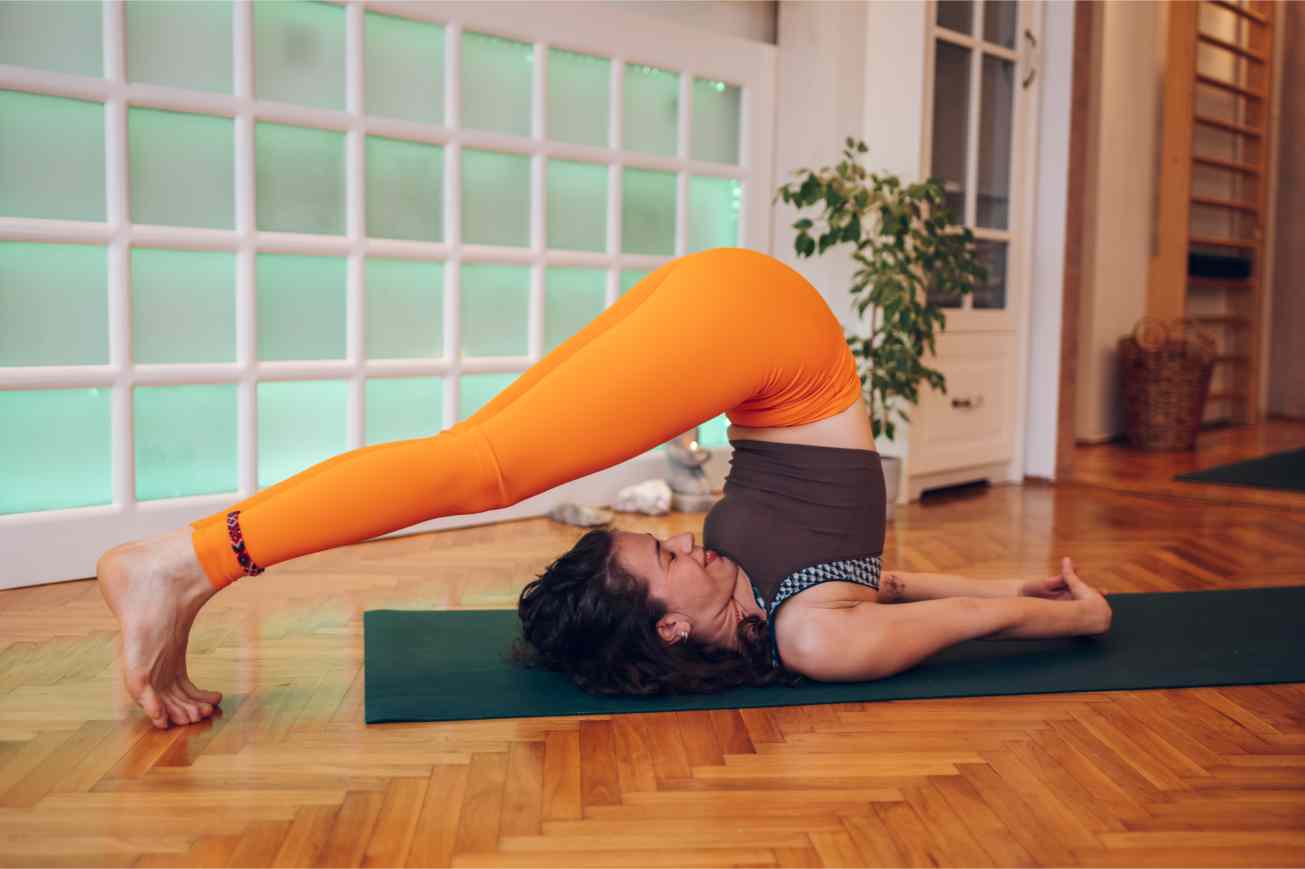
Halasana is a body-bending inversion yoga pose that effectively reverses blood flow and strengthens core muscles and the spine. Furthermore, this pose requires you to lie on your back and bend your legs over your head. This, in turn, helps to retain the flexibility of your body.
Yoga Level: Intermediate
How to Do Halasana?
Step 1: Lie on a soft yoga mat, resting your hands by your side with your palms facing downwards.
Step 2: Inhale and lift your abdominal muscles upwards.
Step 3: Breathe steadily, support your waist with your hands and push your lower back portion over your head.
Step 4: Now hold the position for a few moments.
Step 5: Release and repeat a few times.
What are the Safety Precautions to Take While Performing Halasana?
- Perform a thorough warm-up routine focusing on the neck, shoulders, back, and hamstrings. Poses like cat-cow, shoulder stand (Sarvangasana), and forward bends can be good preparations.
- If you are new to Halasana, learn the pose under the supervision of an experienced yoga instructor to ensure proper alignment and technique.
- Ensure your shoulders are firmly on the ground and your neck is free from pressure.
Who Should Avoid Practising Halasana?
- Avoid practising plough pose if you are suffering from diarrhoea.
- Avoid practising if you have high blood pressure.
- Keep your shoulder attached to the ground throughout the process to avoid injury.
7. Shoulder Stand Pose - Sarvangasana
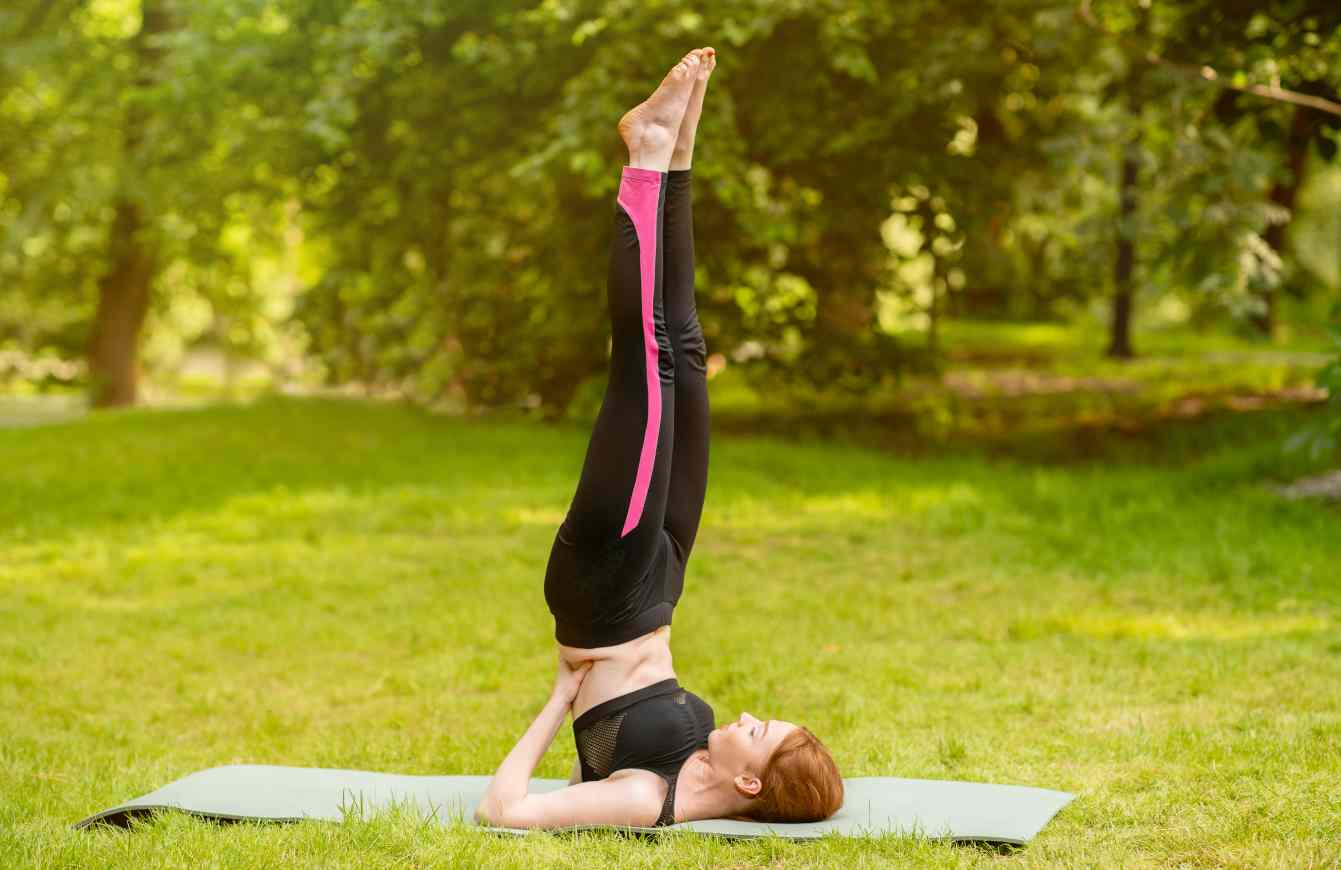
The shoulder stand pose connects with parasympathetic nerves, increasing their functionality. Further, this posture is also helpful for stimulating the digestive system and helps blood travel to every part of the body.
Yoga Level: Intermediate
How to Do Sarvangasana?
Step 1: Lie on a soft yoga mat with your hands resting by your side.
Step 2: Raise your waist, resembling a bridge pose.
Step 3: Press and hold your waist firmly with your hands.
Step 4: Hold this position for a few seconds and release.
What are the Safety Precautions to Take While Performing Sarvangasana?
- If you are new to Sarvangasana, learn the pose under the supervision of an experienced yoga instructor to ensure proper alignment and technique.
- Place a folded blanket or towel under your shoulders to protect your neck and provide cushioning. Ensure your head is off the blanket to maintain a natural curve in your neck.
- Keep your legs straight and together, pointing your toes towards the ceiling.
Who Should Avoid Practising Sarvangasana?
- Avoid it if you have a neck injury.
- Avoid this pose if you have high blood pressure.
- Do not practise this pose if you have Glaucoma.
- Immediately stop performing if you face any pain.
8. Wheel Pose - Chakrasana
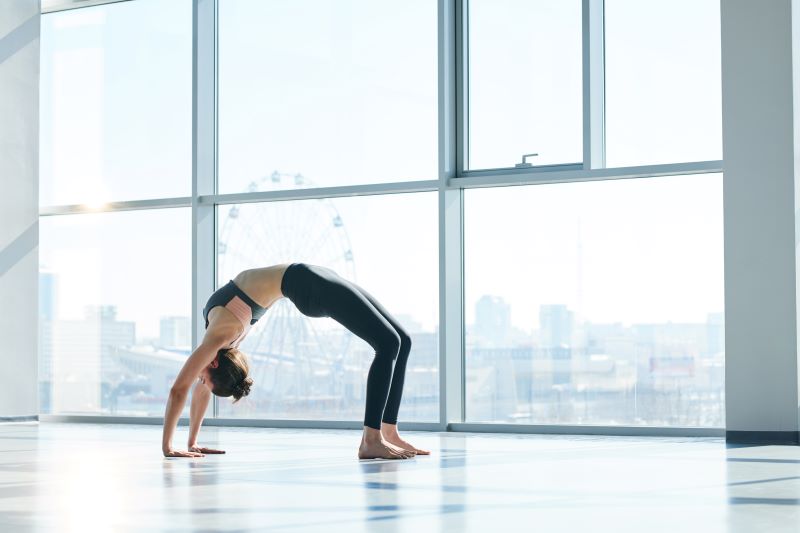
A wheel pose is a complete body-bending posture that resembles the shape of a wheel. In addition, this posture is extremely helpful for retaining body flexibility, keeping your spine healthy, and strengthening your core muscles. As it involves extreme stretching, it is also beneficial for removing fats.
Yoga Level: Intermediate
How to Do Chakrasana?
Step 1: Lie on your back on a soft yoga mat.
Step 2: Bend your knees and tighten your lower back muscles.
Step 3: Bend your hands overhead and press them on the ground.
Step 4: Now inhale deeply and lift your body upwards.
Step 5: Lift your head off the floor and hold the position briefly.
What are the Safety Precautions to Take While Performing Chakrasana?
- Use yoga blocks under your hands or a strap around your thighs to help with alignment and support.
- Place your feet hip-width apart and parallel. Position your hands shoulder-width apart with fingers pointing towards your shoulders.
- Ensure your hands are properly placed with fingers spread wide to distribute weight evenly.
Who Should Avoid Practising Chakrasana?
- Pregnant women should avoid this posture.
- Avoid it if you have heart ailments.
- Avoid practising if you are suffering from a hernia.
9. Crow Pose - Kakasana
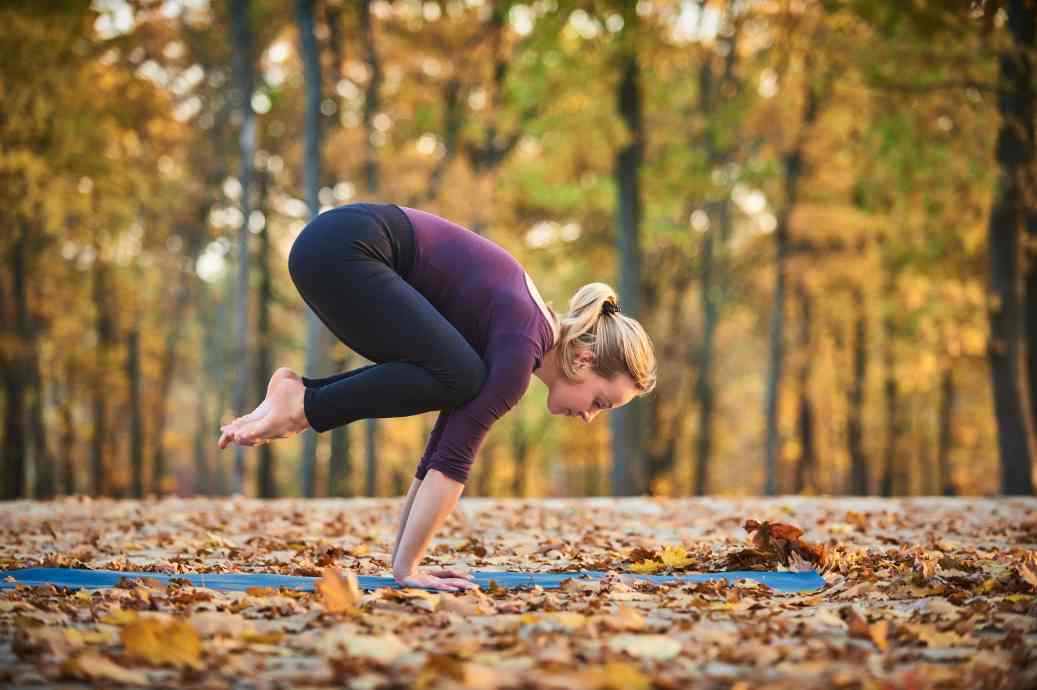
Crow pose includes lifting your body in the air with the support of your hands. Therefore, you can create great body balance and flexibility in this posture. In addition, the pose is beneficial for strengthening arms, glutes, wrists and leg muscles.
Yoga Level: Intermediate
How to Do Kakasana?
Step 1: Place your legs flat and wide on the floor.
Step 2: Place your palms on the floor and shift the body weight on your hands.
Step 3: Lift your legs, hips and waist by leaning forward.
Step 4: Fix your knees with your arms.
Step 5: Bend your knees and lift your body.
Step 6: Hold this position briefly and then release slowly.
What are the Safety Precautions to Take While Performing Kakasana?
- If you are new to Kakasana, learn the pose under the supervision of an experienced yoga instructor to ensure proper alignment and technique.
- Place a folded blanket or cushion before you to protect your head in case of a fall.
- Perform a thorough warm-up routine focusing on the wrists, shoulders, core, and hips.
Who Should Avoid Practising Kakasana?
- Avoid if you have a wrist injury.
- Avoid it if you have a hiatal hernia.
- Refrain from practising if you have spondylitis.
- Avoid if you have a shoulder injury, heart problems, cerebral thrombosis or carpal tunnel syndrome.
10. Feathered Peacock Pose - Pincha Mayurasana
Pincha Mayurasana is an advanced inversion yoga pose of Mayurasana. This pose is beneficial for reversing blood flow, reducing anxiety and stress, attaining body balance, and improving digestion.
Yoga Level: Advanced
How to Do Pincha Mayurasana?
Step 1: Lie on your forearms and knees facing a wall.
Step 2: Contract your legs and lift your waist, like a downward-facing dog pose.
Step 3: Bring your feet close to your elbows.
Step 4: Exhale and lift one leg upward.
Step 5: Do the same with the other leg and land both toes on the wall.
Step 6: Remain in this position for at least 5 minutes and then release slowly.
What are the Safety Precautions to Take While Performing Pincha Mayurasana?
- Always warm up your body before attempting advanced yoga poses like Pincha Mayurasana. Focus on stretching your shoulders, wrists, core, and hamstrings.
- Before attempting the pose, develop sufficient upper body strength, particularly in your shoulders, arms, and core muscles.
- When learning Pincha Mayurasana, practice against a wall to provide support and prevent falling backwards.
Who Should Avoid Practising Pincha Mayurasana?
- Do not practise this pose if you have a headache.
- Refrain from practising this pose during pregnancy and menstruation.
- Avoid practising if you have a neck injury.
Benefits of Doing Inversion Yoga Poses Daily
Inversion yoga poses, characterised by their upside-down orientation, offer many physical and mental benefits, from improved circulation and strength to enhanced focus and stress relief.
- Improved Circulation: Inversions help reverse blood flow in the body, promoting better circulation. This can benefit the cardiovascular system by reducing strain on the heart and improving blood flow to the brain and other vital organs.
- Enhanced Lymphatic Drainage: Inversions stimulate the lymphatic system, crucial for immune function and detoxification. By encouraging lymphatic drainage, inversion poses help remove toxins and waste products from the body more efficiently.
- Increased Strength and Stability: Inversion poses engage various muscle groups, including the core, shoulders, arms, and back. Regular practice can increase strength, stability, and muscular endurance, particularly in the upper body and core.
- Improved Posture: Inversions help decompress the spine and lengthen the muscles along the back, improving posture and alleviating neck and shoulder tension. Strengthening the muscles that support proper alignment promotes better posture on and off the mat.
- Stress Relief: Inversions have a calming effect on the nervous system, helping to reduce stress, anxiety, and tension. The change in perspective and the release of endorphins during inversion poses can promote feelings of relaxation and well-being.
- Enhanced Focus and Mental Clarity: Practising inversion poses requires concentration and mindfulness, which can help improve focus and mental clarity. The increased blood flow to the brain during inversions can also enhance cognitive function and alertness.
- Increased Energy Levels: Inversions are invigorating and can help boost energy levels by stimulating the body and mind. Many practitioners report feeling more energised and rejuvenated after practising inversion poses.
- Improved Digestion: Certain inversion poses, such as the Legs-Up-the-Wall pose, can aid digestion by promoting waste movement through the digestive tract and reducing bloating and gas.
- Boosted Immunity: The lymphatic stimulation and detoxification effects of inversion poses can help strengthen the immune system and improve overall health and resilience to illness.
- Emotional Balance: Inversions can have a grounding and centring effect on the mind, helping balance emotions and cultivate inner peace and tranquillity.
Incorporating inversion yoga poses into your routine can profoundly enhance your health and well-being. These poses offer numerous benefits, including improved circulation, enhanced lymphatic drainage, and cardiovascular health. They also reduce stress and anxiety, promote mental clarity and focus, and strengthen core and upper body muscles.


